


Adding a Little Flare to Your Ikea Belly Basket


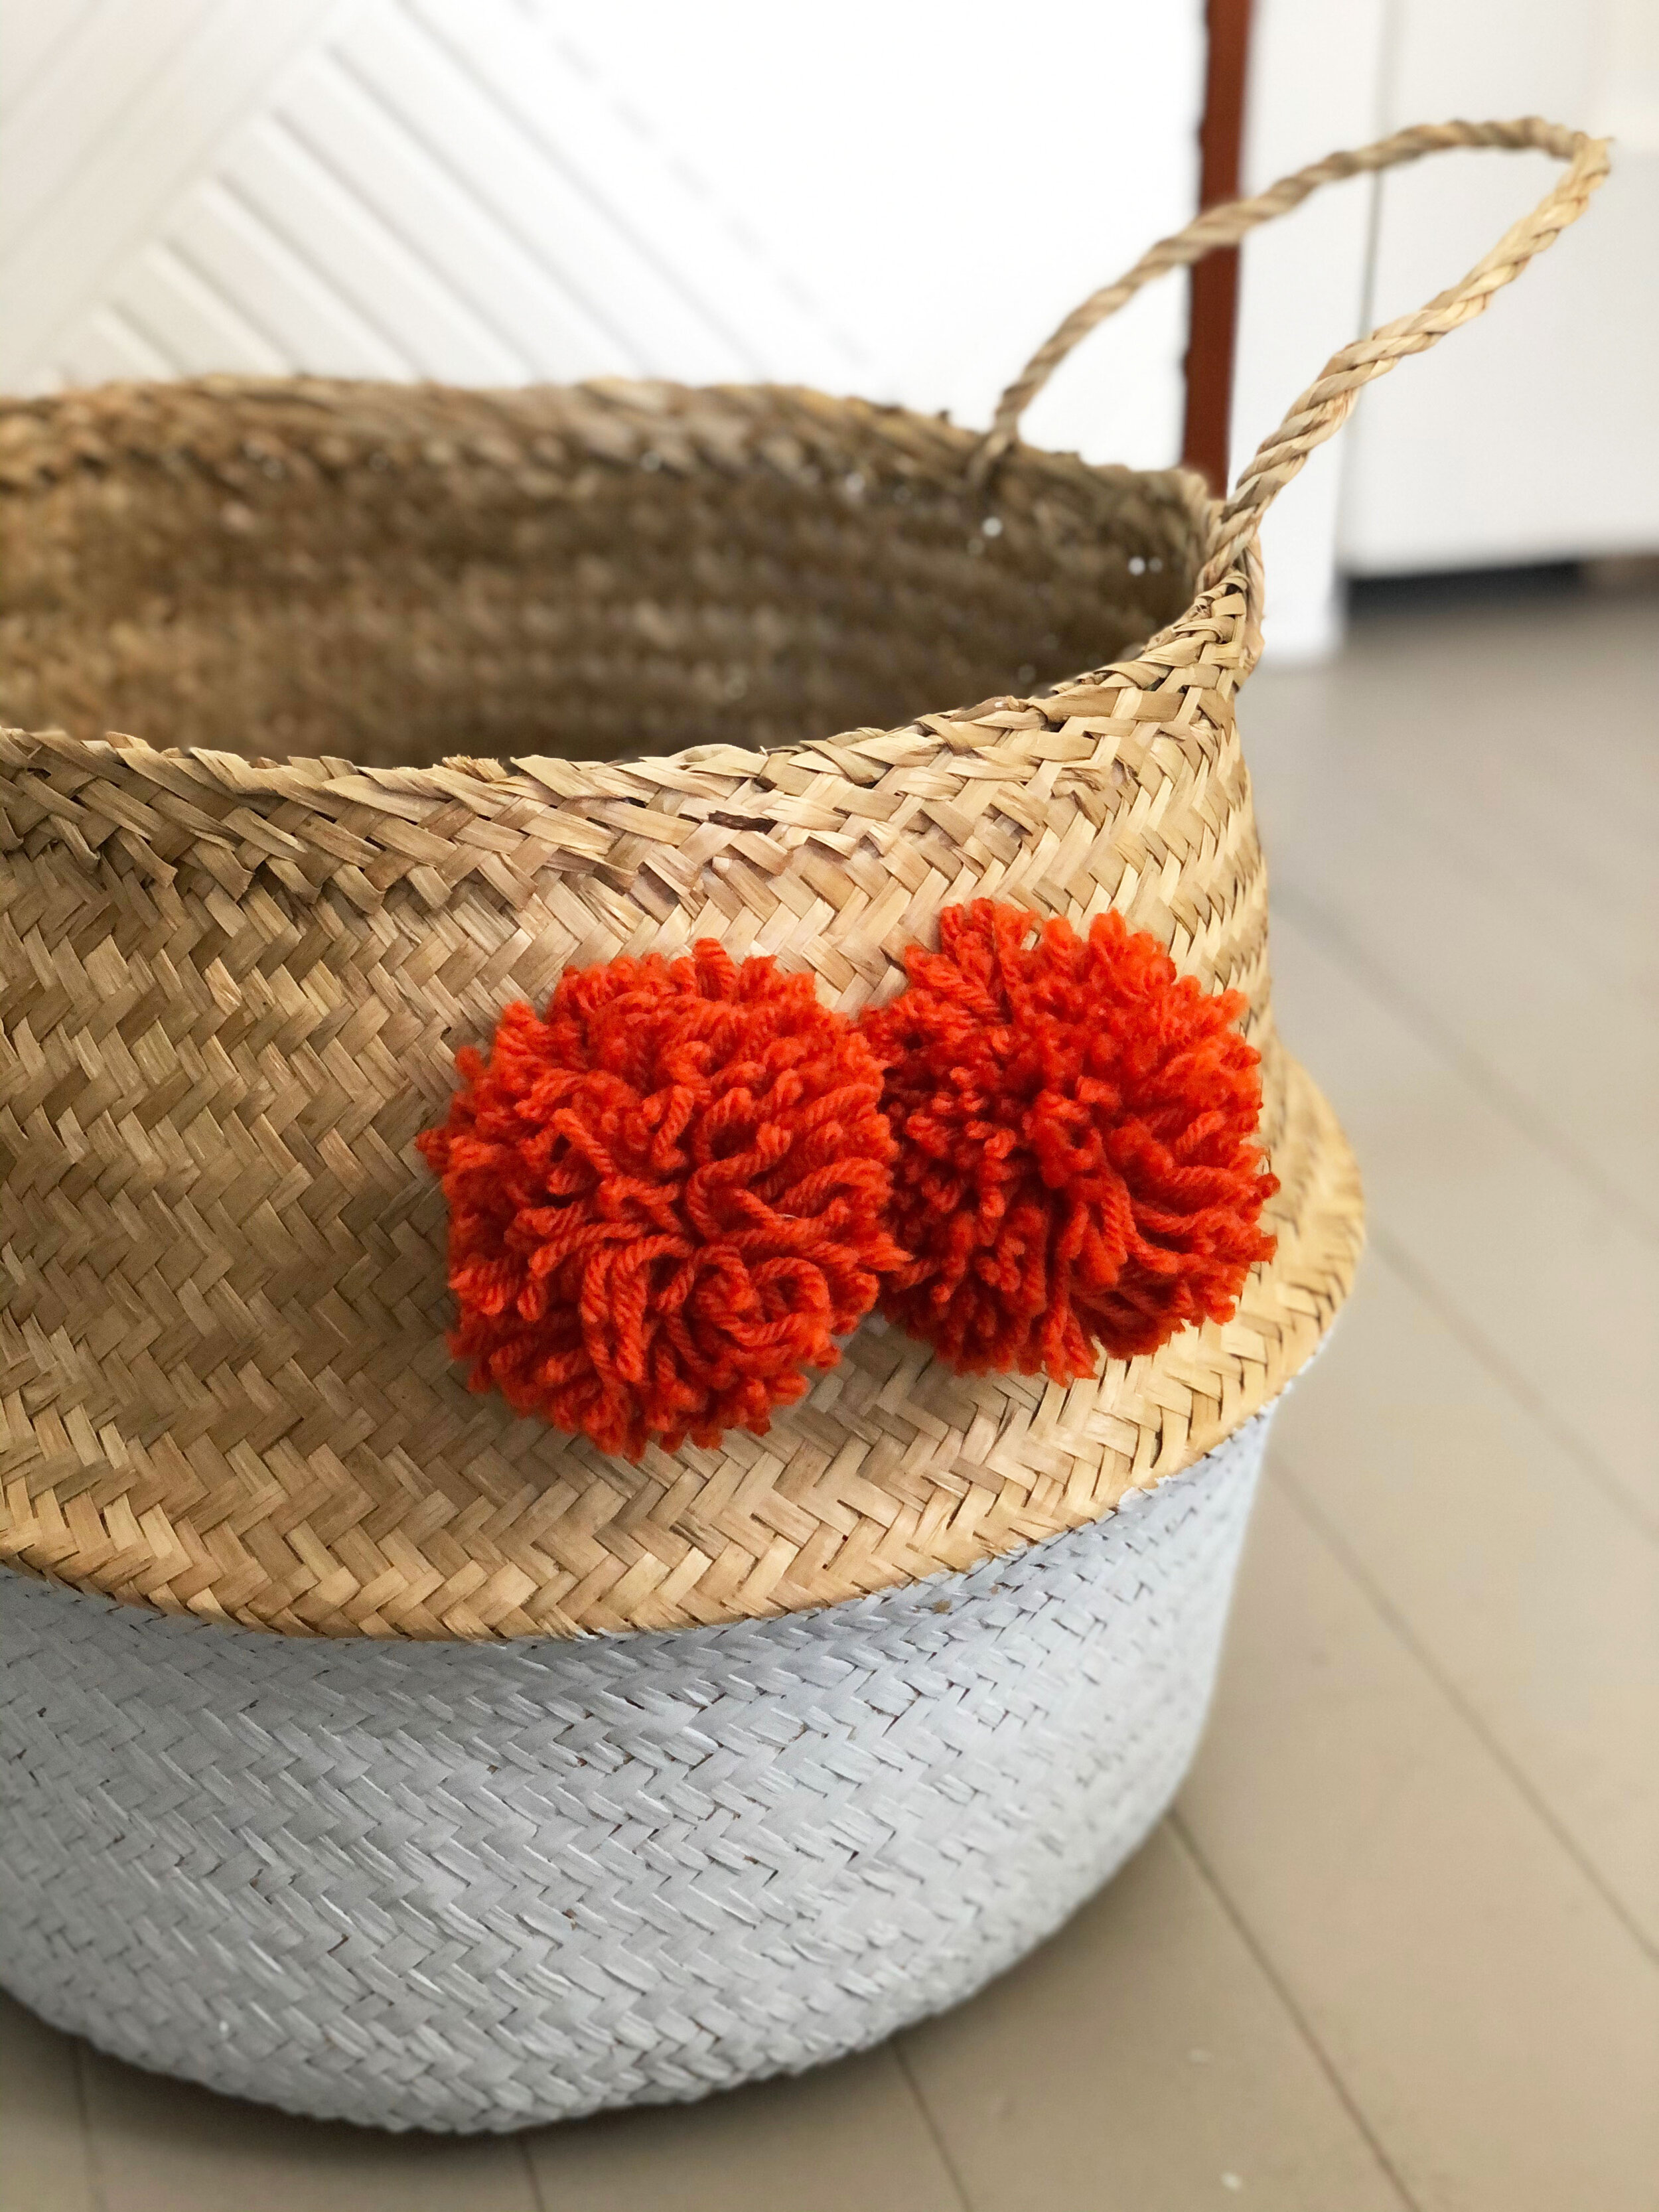
The new and improved basket adds a pop of color to Chaplin’s nursery.
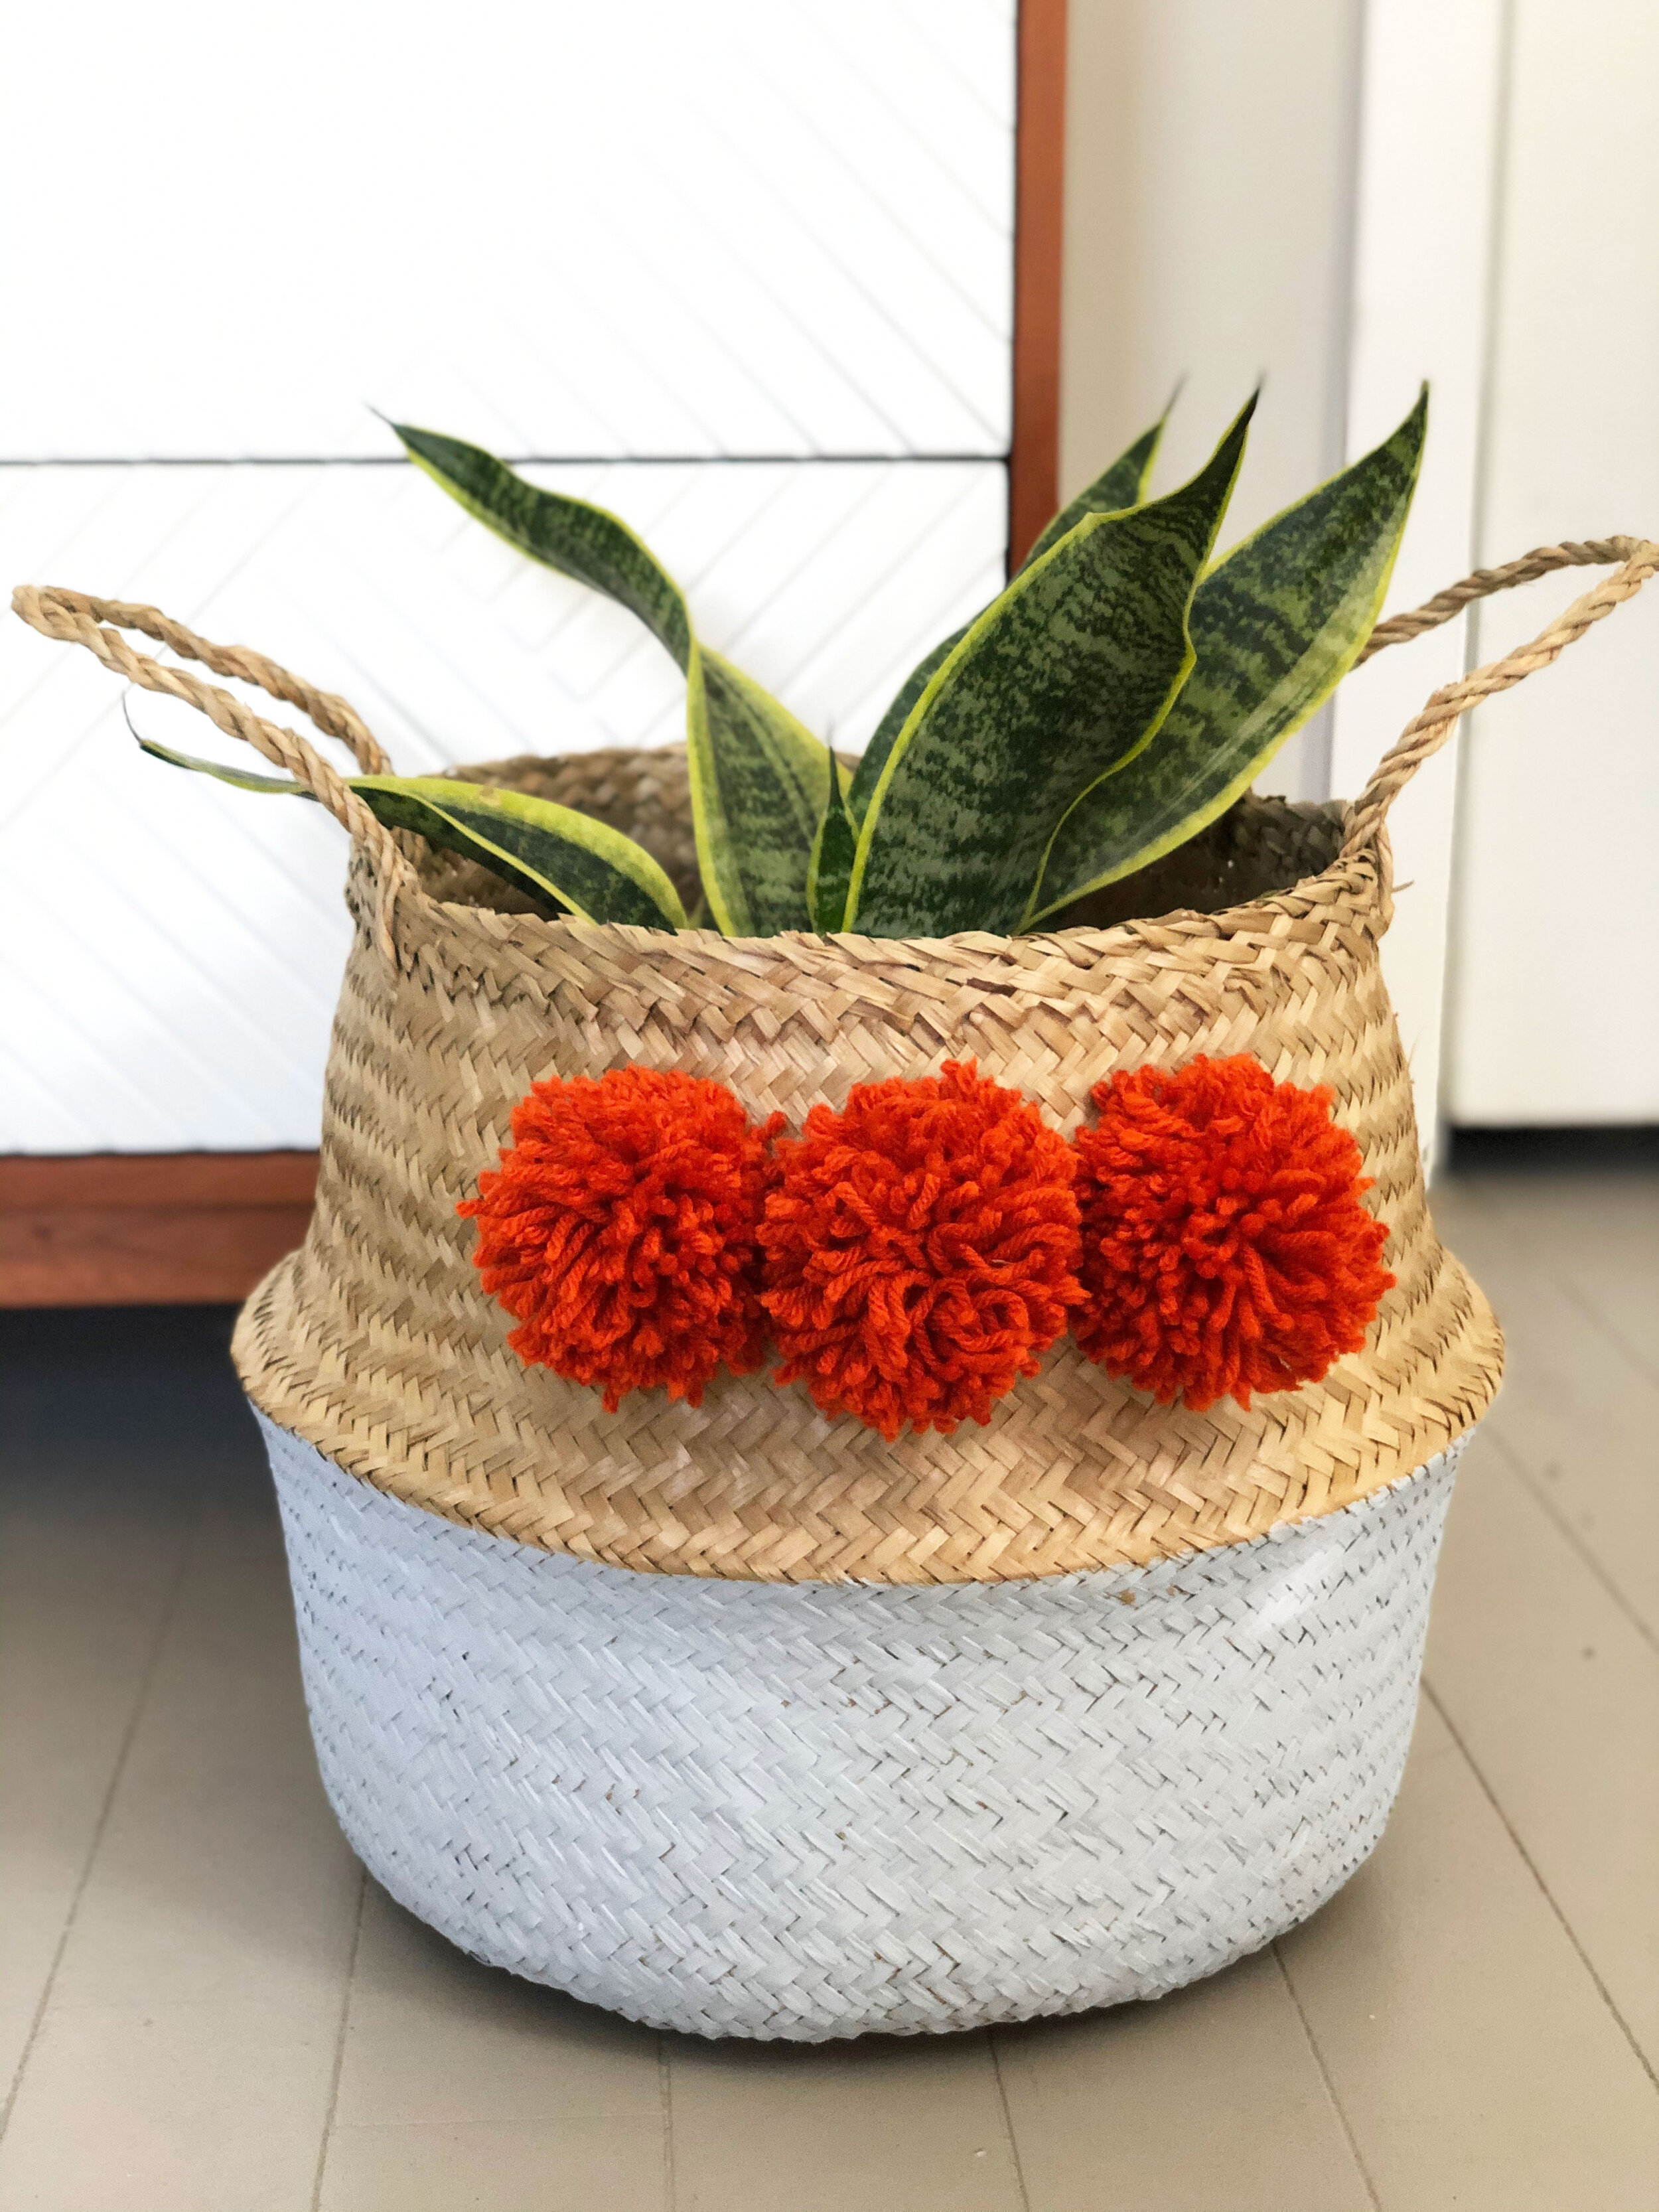
First let me say that I LOVE picking up a few of Ikea’s seagrass belly baskets whenever I make the hike to their store. [Ikea refers to them as the Fladis basket.]
Reasons I love these baskets so much:
1. They make the perfect gift basket for a wedding or baby shower. Just wrap your gift inside and add some tissue paper.
2. They are the perfect little textured, store-all for any room!
3. They are only $9.99!!!
All that said, I decided to spice up the one for Chappy’s nursery. I felt like it needed some pops of color and contrast for his room.
Follow these 3 simple steps to create your own unique belly basket. #ikeahack

DIY painted belly basket with pom-poms
DIY difficulty level: Pretty Easy. I would give it a 4 out of 10. The hardest part is making the pom-poms, so you could buy them instead if that is easier for you!

Supplies for DIY Nursery Mobile:
Belly Basket: Ikea Fladis basket
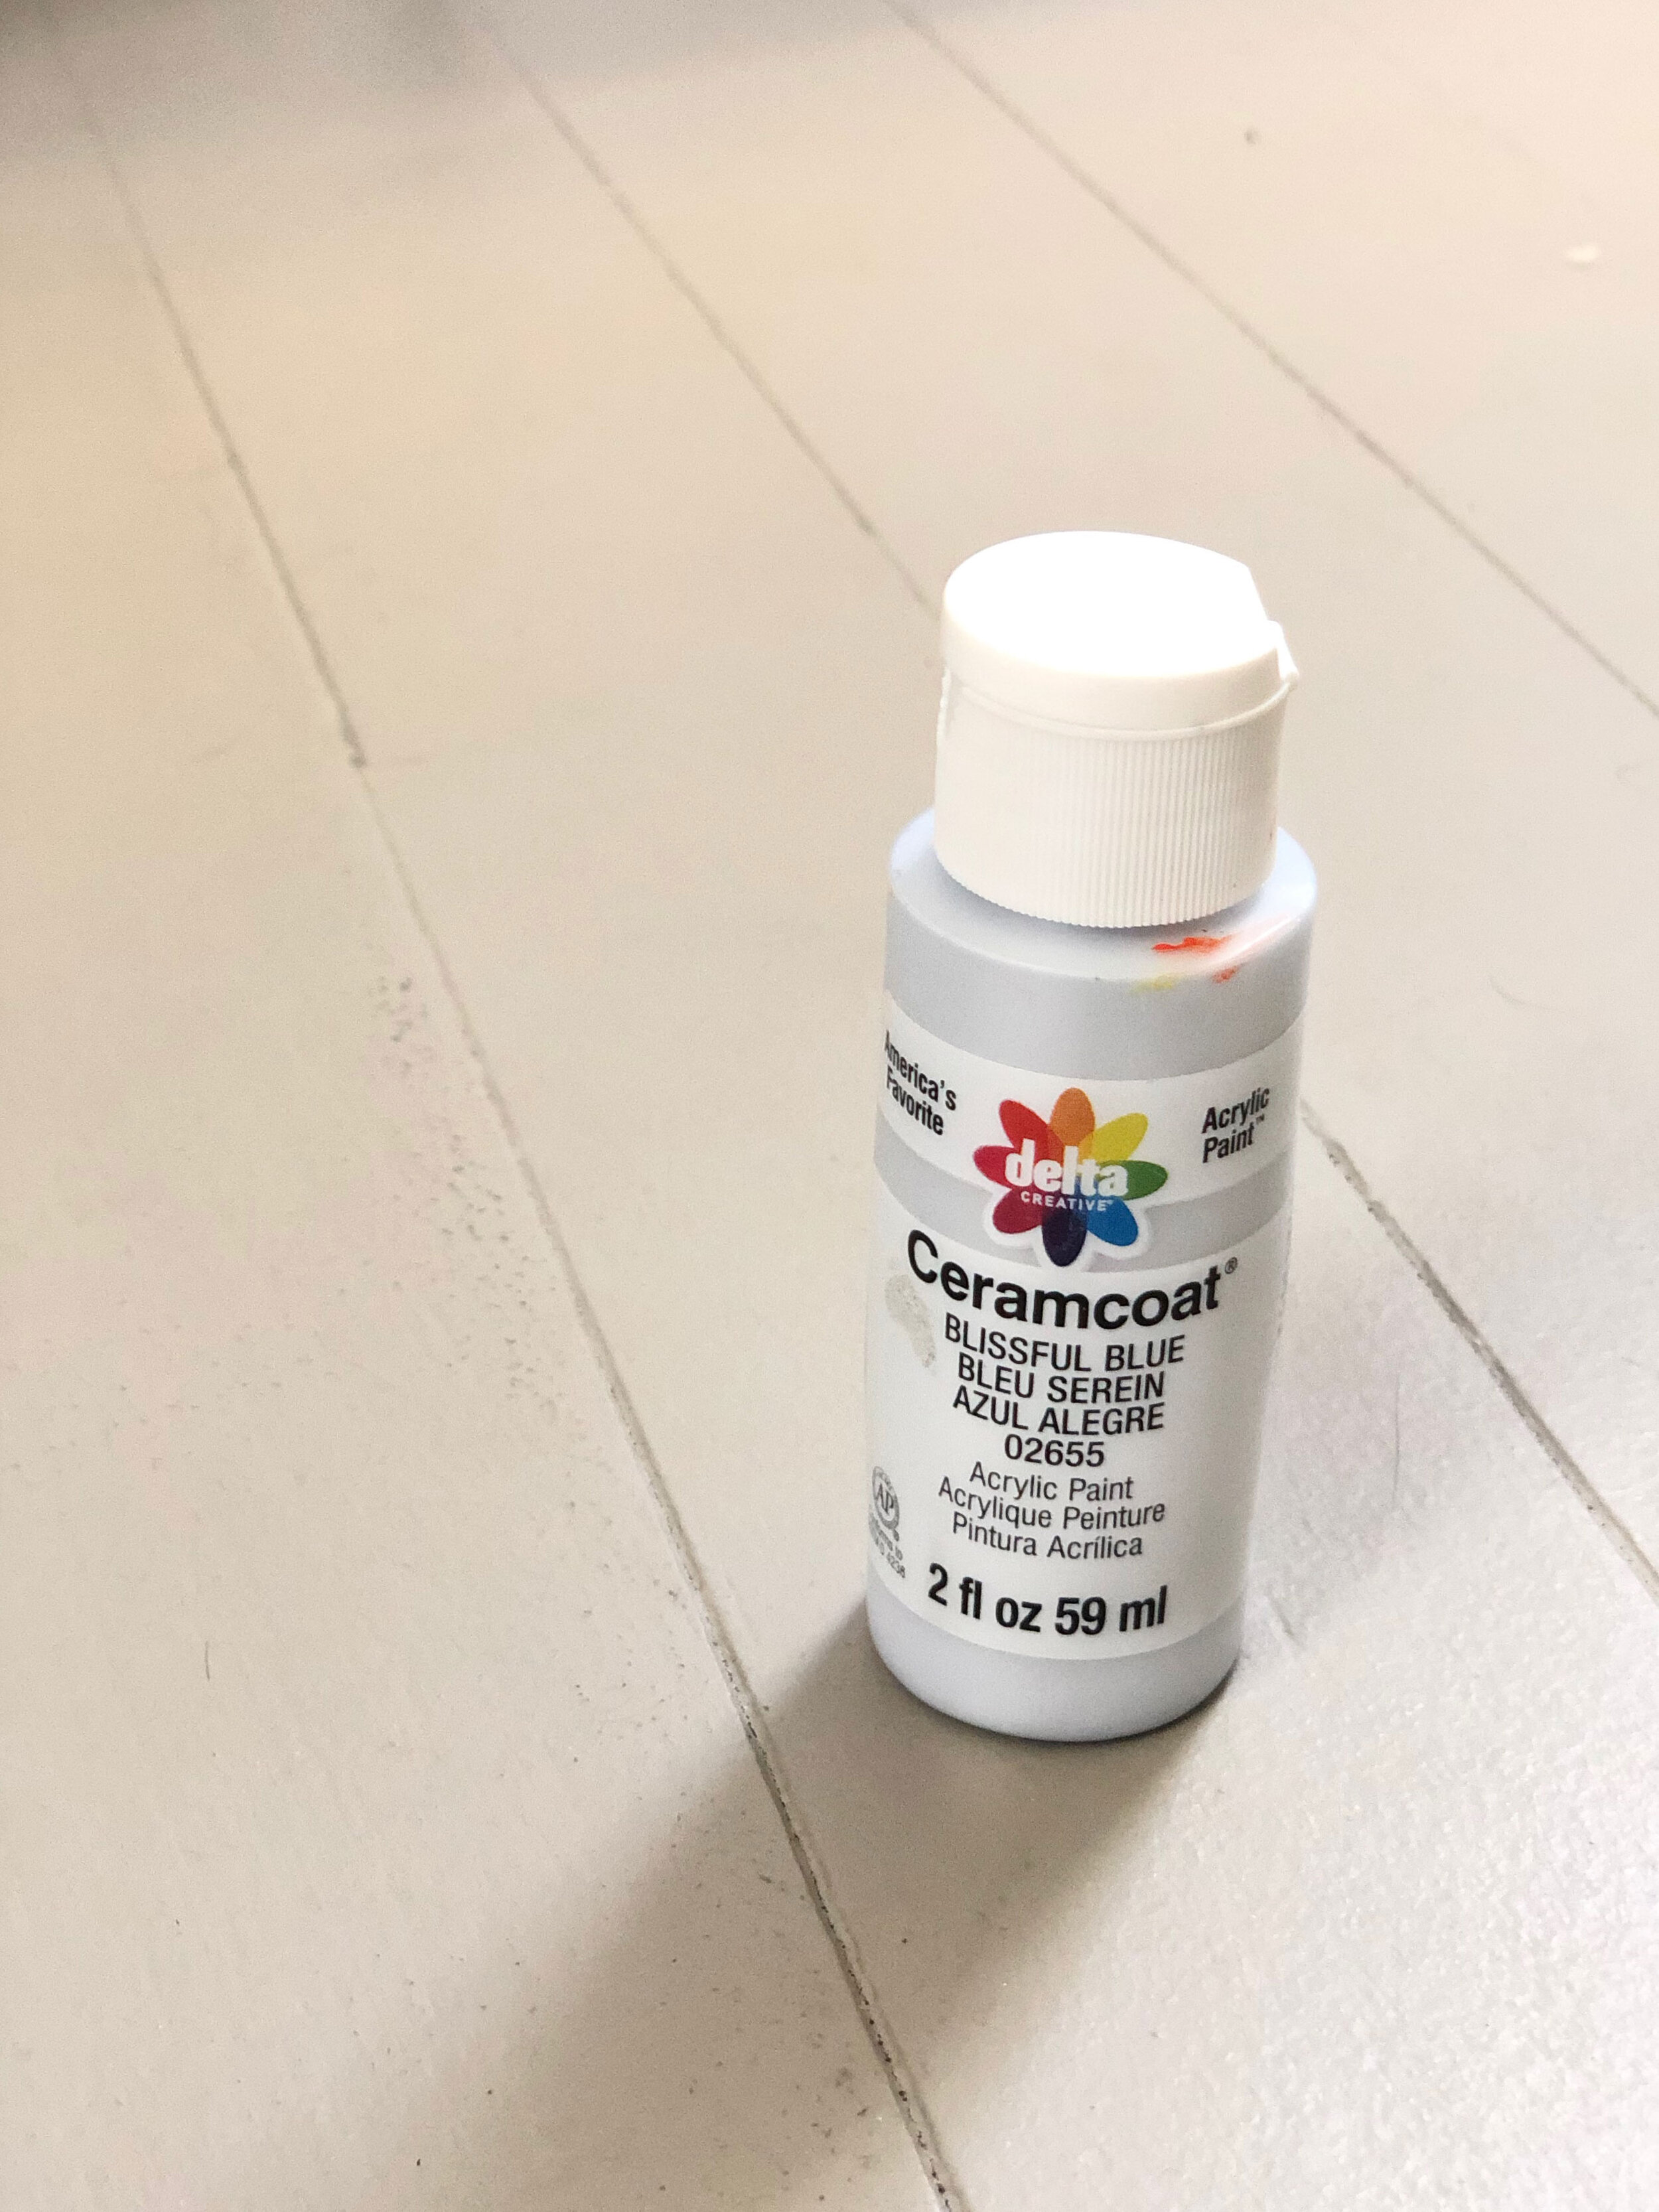
Acrylic Craft Paint: Blissful Blue by Ceramcoat
Yarn (or pom-poms already made that include a yarn tail): Pumpkin from Lion Brand® DIYarn


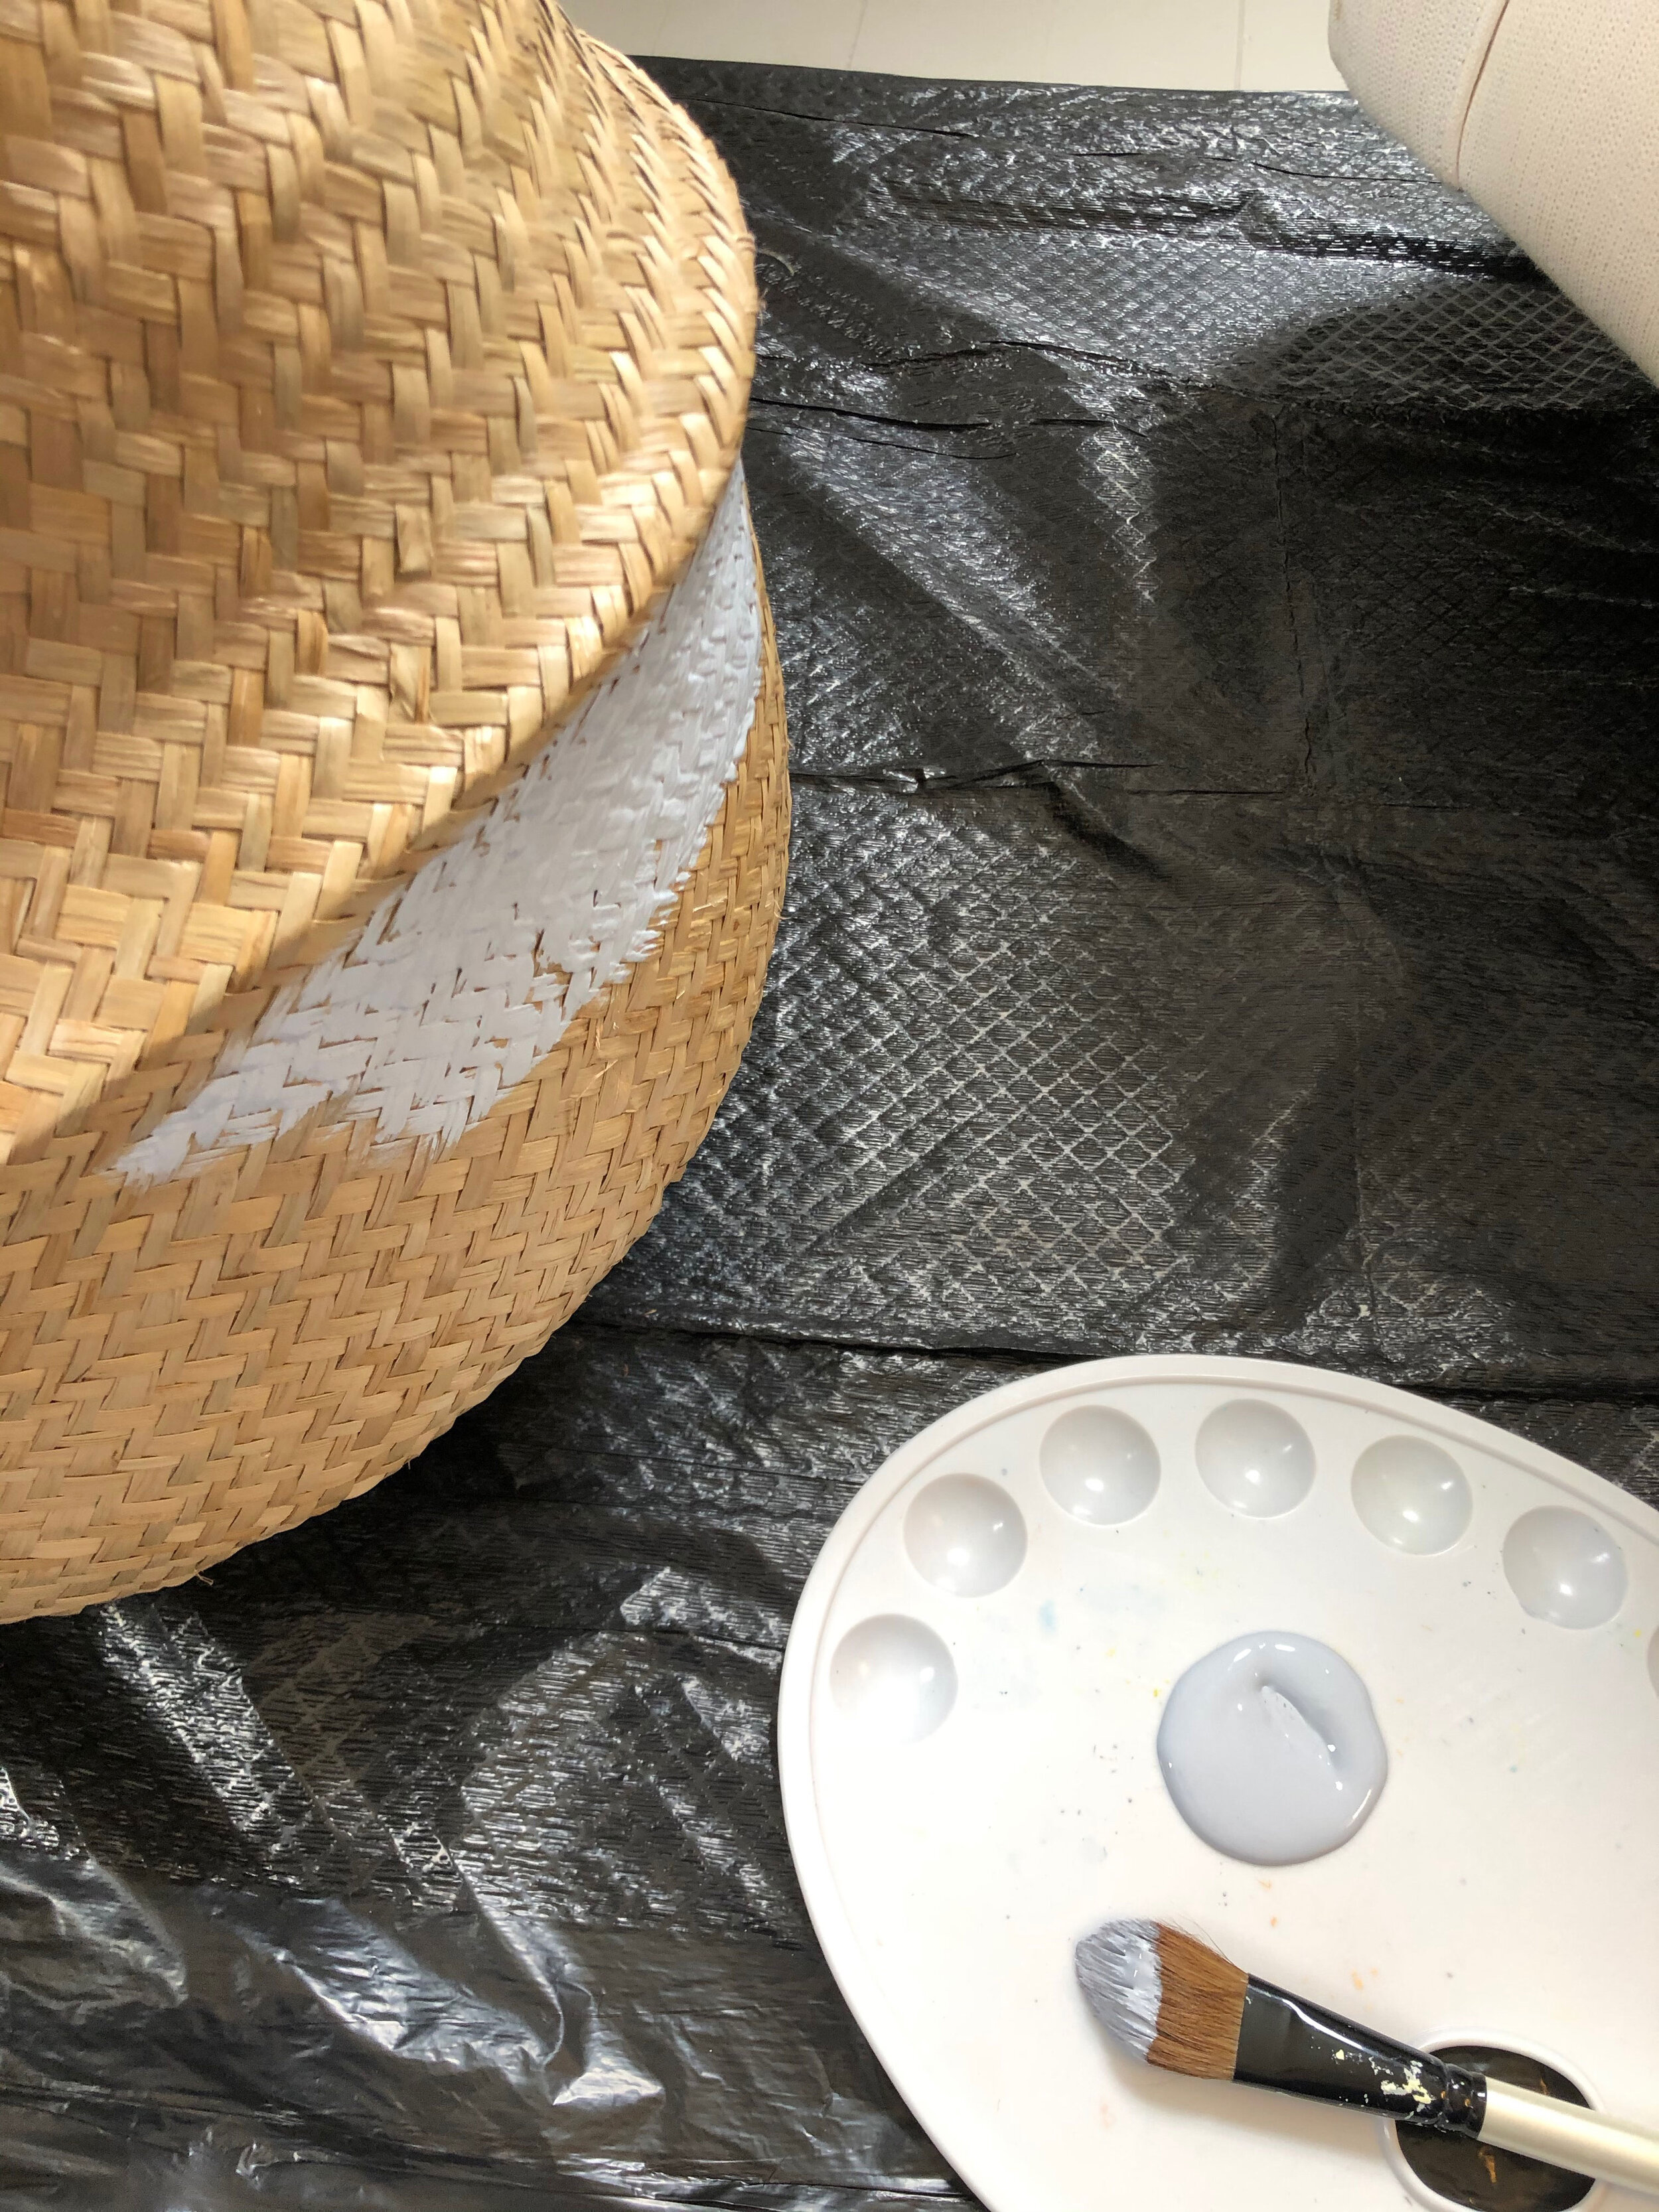
STEP ONE: Paint the bottom half of the basket with acrylic craft paint.
The wonderful news is that the fold in the basket makes it very easy to paint along the line. No need to tape or anything. (Also, I did not paint the underside of the basket. NO need bc no one can see it.) The painting process was pretty quick and pain free! I chose the color Blissful Blue by Ceramcoat.


Wrap yarn around your hand to quickly make your own pom-poms.
STEP TWO: Make (or buy) 3 pom-poms for the front of your basket
The great thing about making the pom-poms is that you can choose the perfect color. Here is a very simple tutorial on making your own pom-poms. Basically you wrap yarn around your hand about 100 times, then you tie it in the middle with yarn. WHEN YOU TIE THE LOOP, LEAVE A LONG TAIL OF YARN TO TIE IT TO THE BASKET. Snip all the loops and trim the pom pom to the right shape.
I’ve also ordered lots of pom-poms on Etsy, so check there if you don’t want to make them.
For my yarn, I chose the color pumpkin from Lion Brand® DIYarn at Michaels Craft store.

MAKE SURE YOU LEAVE the tail on the pom-poms.

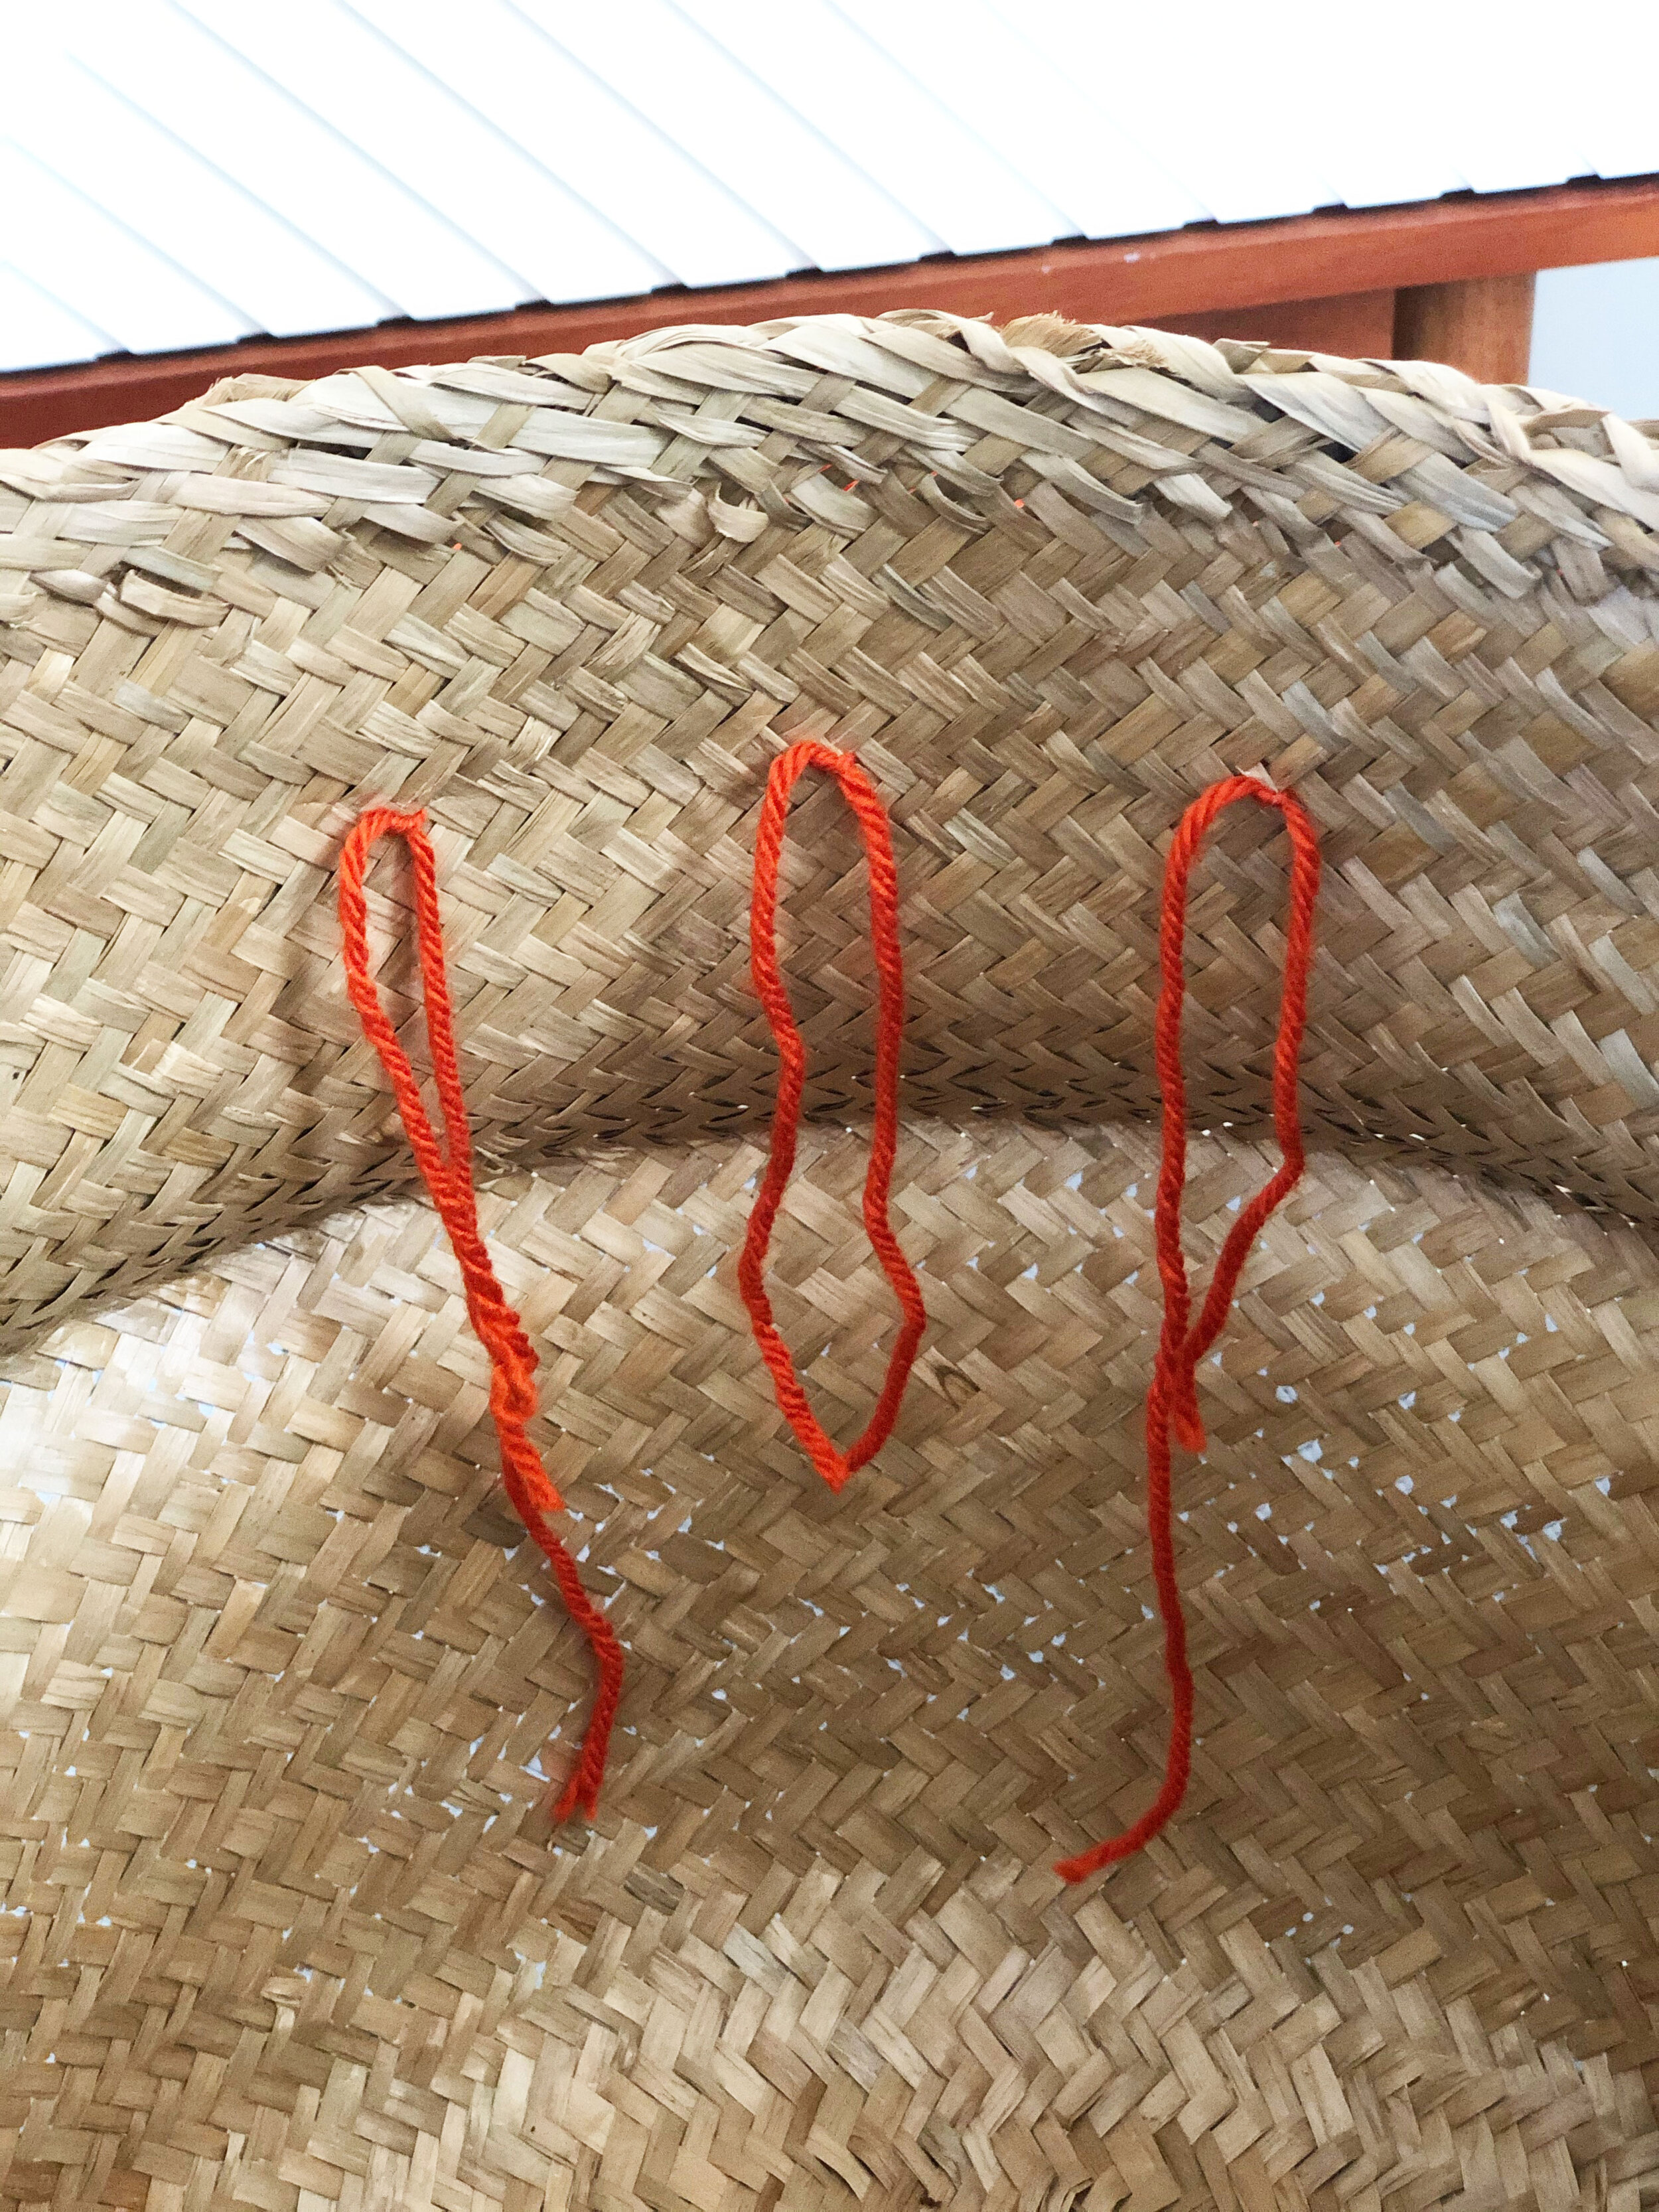
STEP THREE: Tie the pom-poms to the basket.
Because the basket is a loose weave, you can slide your yarn tails through the front side of the basket and tie inside. Just decide where you want your middle pom-pom first, then add the other pom-poms on either side.
AND YOU ARE DONE! I hope you love it! Looks like a very expensive basket now! #ikeahack
Check out the rest of the nursery design on our last blog post.
This is a project that I was able to complete in 2 nap times! (Yes, that is how I measure time.) The first day I painted the basket. The second day I made the pom-poms and tied them on! Quick and easy, but it adds a lot of punch.
Show me your baskets! Tag @texturedesignco
Have a great day,
Emily

