


DIY Color Block Painting
There was one blank wall just staring at me from across my desk! How could I make a bold, colorful statement without breaking the budget or making the room too busy?
As you may know, we live in a smaller house. When we found out that we were expecting our 2nd child, we decided that the nursery and my office would need to share a room for a little while. Our goal is that eventually the kids would share a room, but for now baby Chappy would share my office. ALL of that to say, whatever went on the blank wall would need to be fitting for the nursery and my office! I thought about photographs, but that seemed too vanilla.
After much consideration, I decided to try my hand at creating a modern color block painting on a raised wood panel. The colors would fit Chappy’s nursery area and also provide color inspiration during my work times.
Not knowing for sure what I was doing, I was AMAZED that the first attempt was successful! The final product fits the space perfectly and makes me smile when I look up! See the full room reveal here.
Below is the DIY process so that you can re-create for your own home!
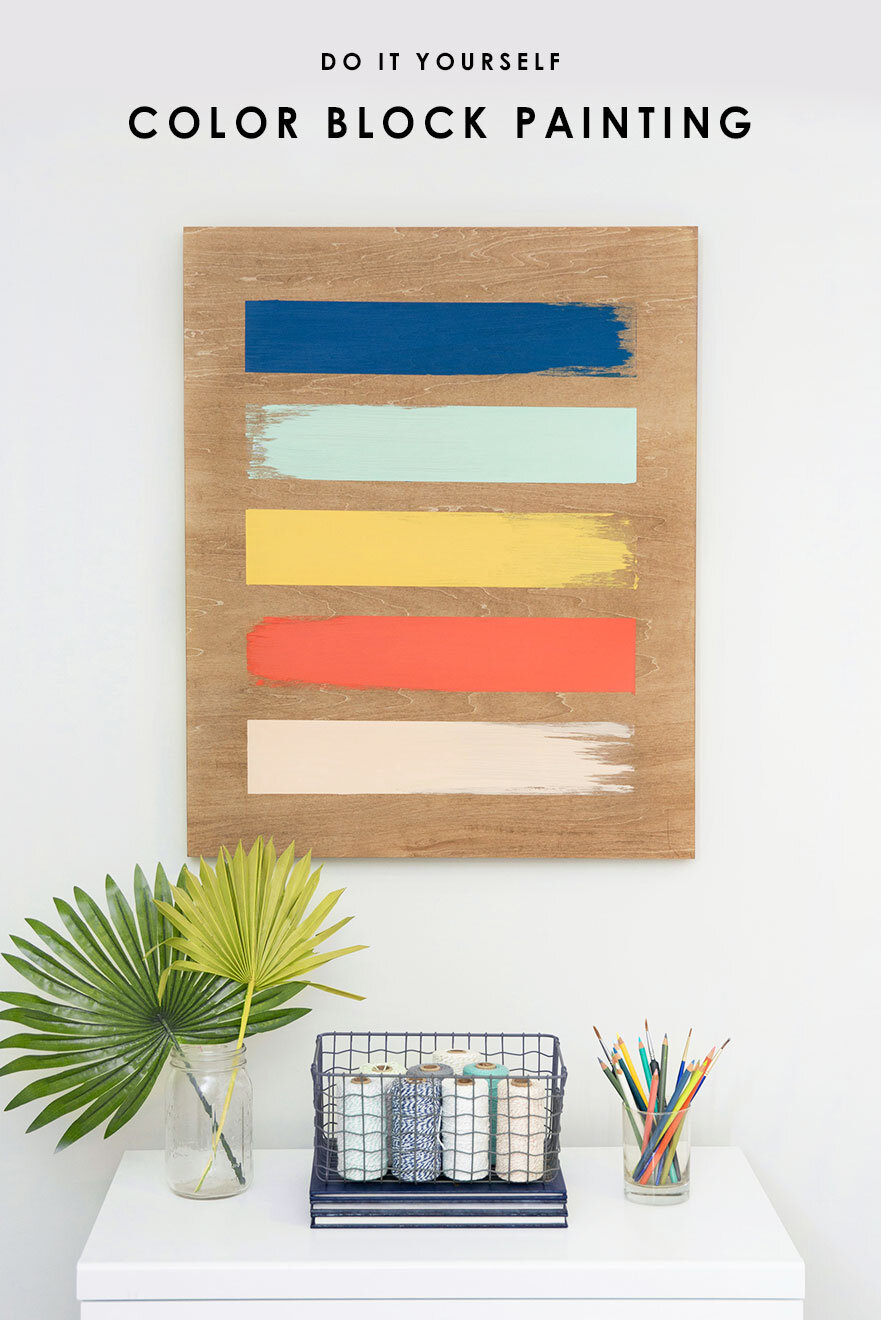
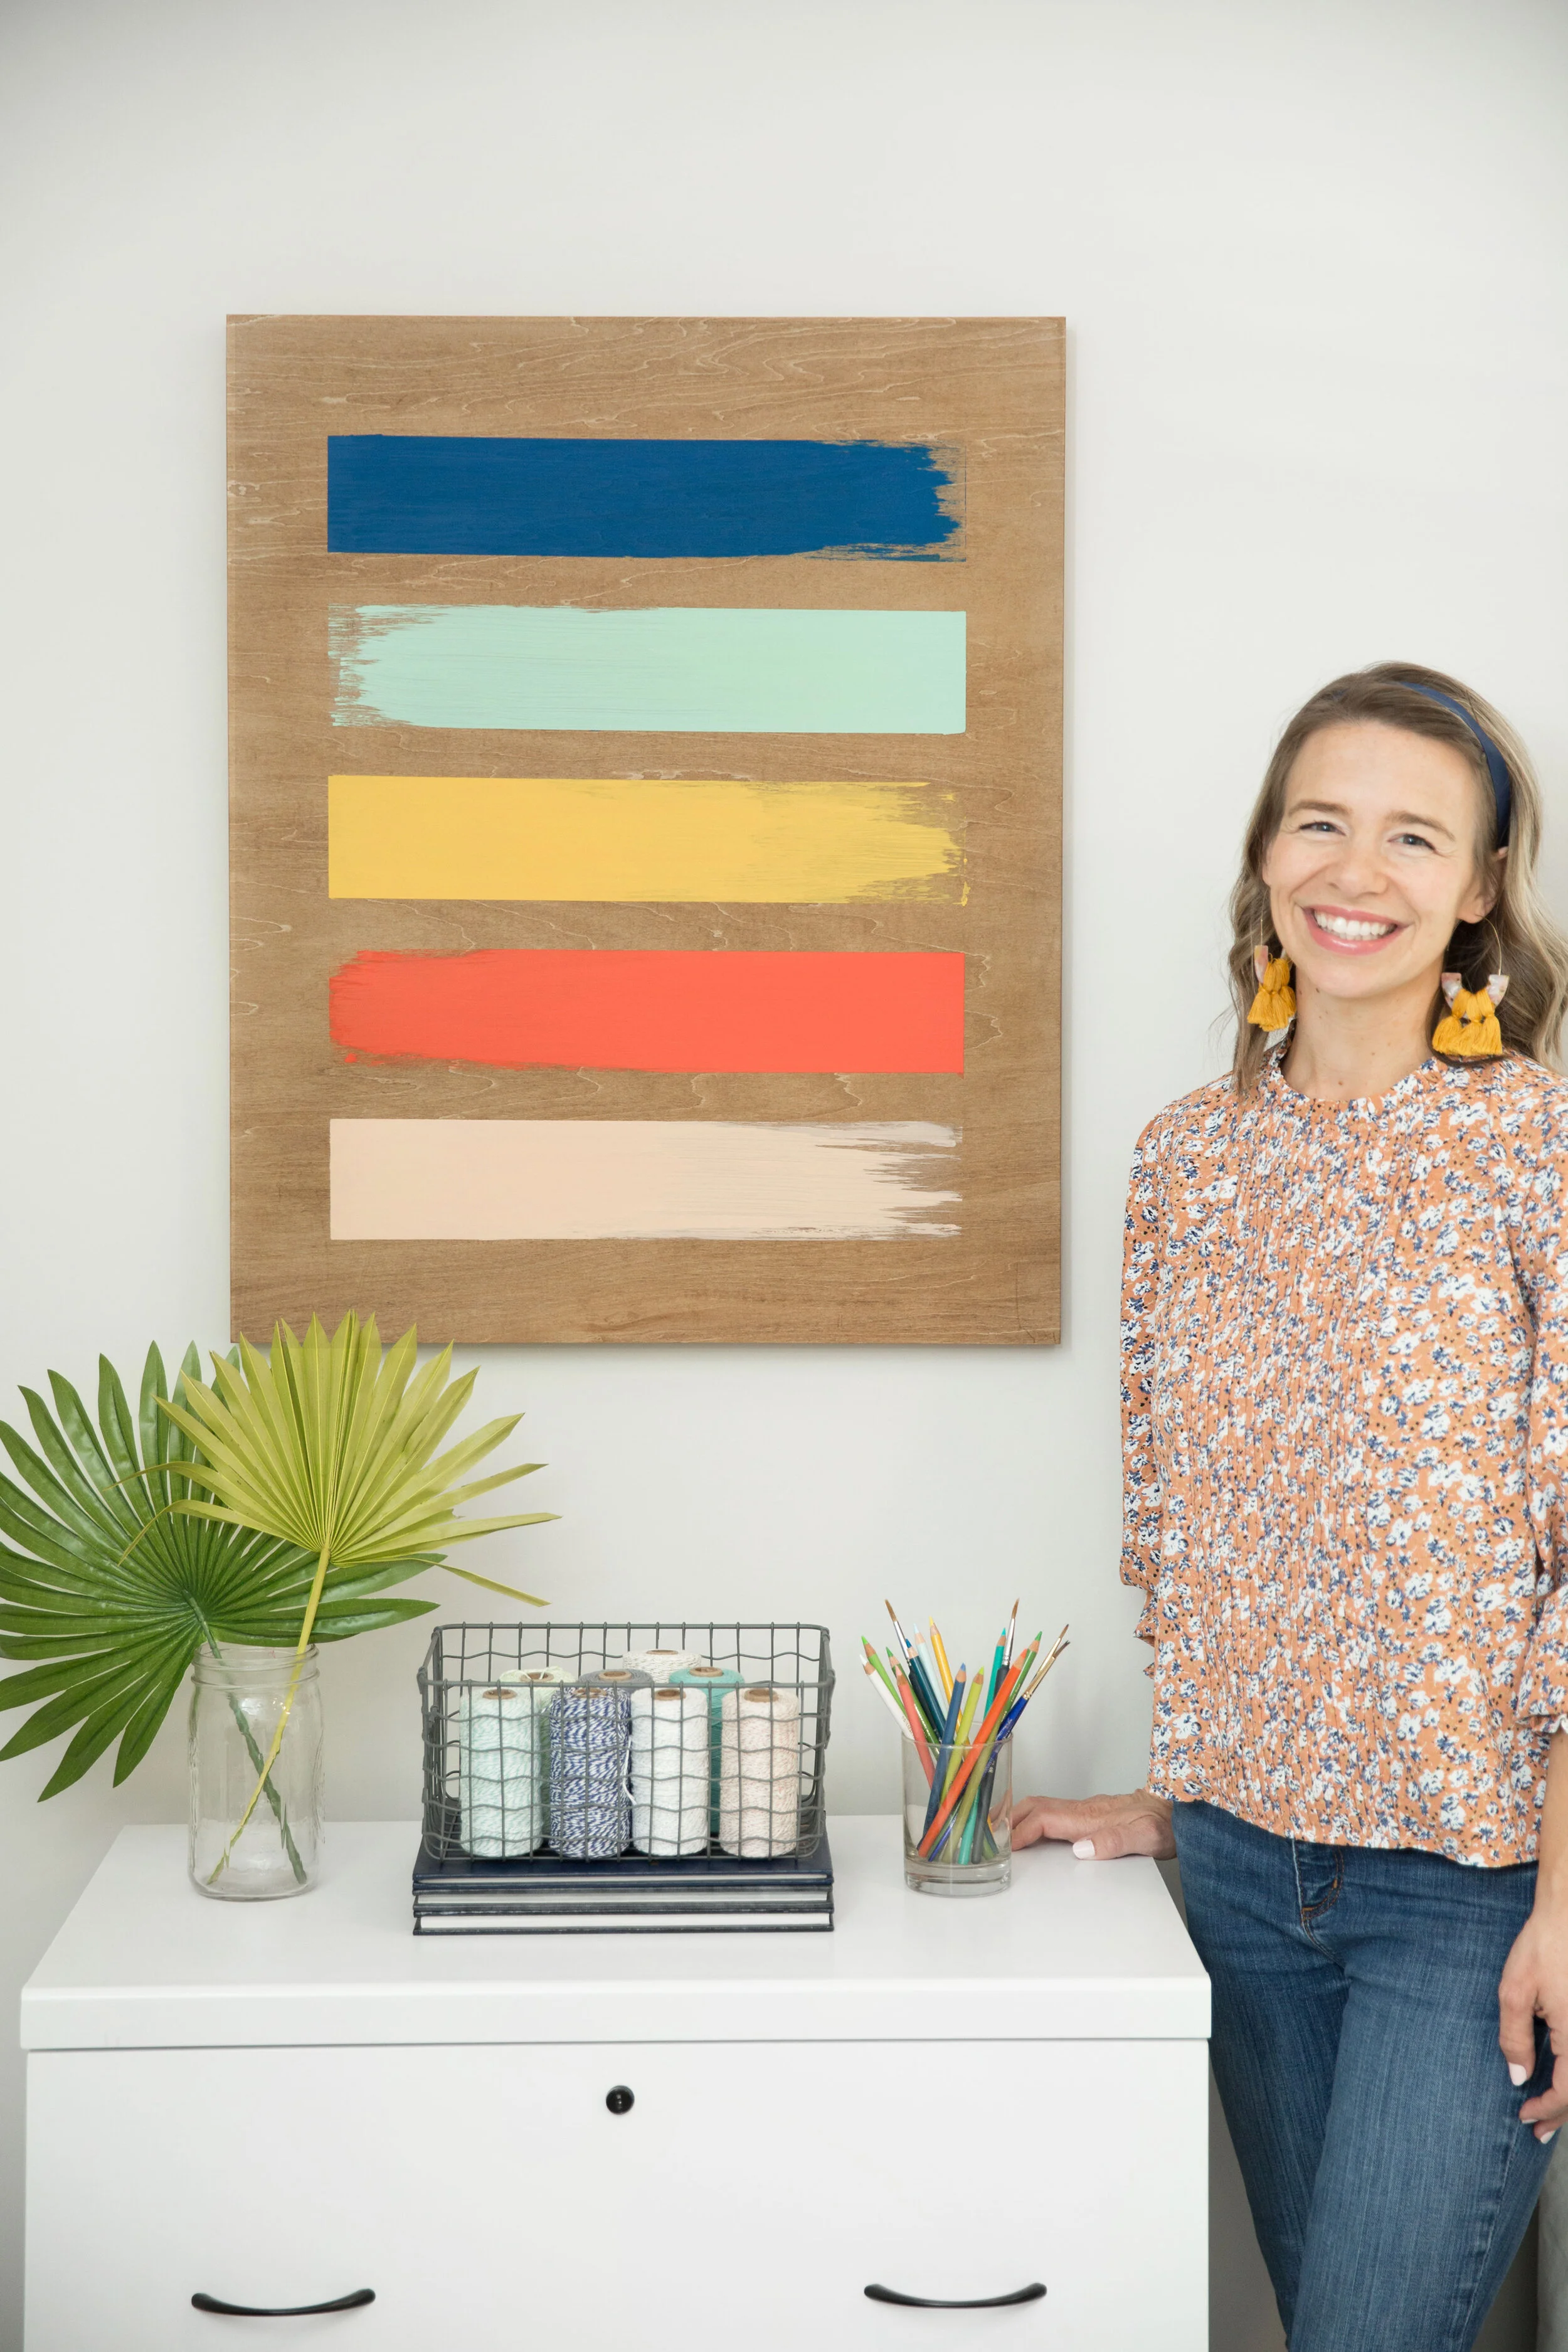
THE FINISHED PRODUCT!

BEFORE: You can see how this wall desperately needed a shot of color.

BEFORE: The light wood of the raised panel didn’t quite work with the wall color, so I knew I’d have to stain it first.

AFTER: The color block art piece adds so much color to the space without making the room feel too busy!


Supplies for DIY Color Block Painting:
Raised Wood Panel from an art store. [24” wide x 30” high]
Wood Stain (Unless you want to leave natural.) I Used Minwax’s Early American stain.
Rag for applying wood stain. (I used an old white tshirt)
1.5 wide” Painters tape (The width is important here! Get 1.5” to make your life easier.)
Acrylic Craft Paint - 5 colors (I mixed several colors to get my final versions. Use the decor in your room to decide the colors best for you. Test these colors together to make sure you like them. Also hold them up to the wood stain to make sure you like them against the stain.)


STEP ONE: Stain the wood panel.
I found it easier to prop up the board by placing cardboard boxes below. Then you can stain the front and sides without messing it up. Follow the instructions on the can of stain. Again, I used Early American by Minwax. I recommend letting it dry for 24 hours. [OUTSIDE! The fumes are yucky.]


STEP TWO: Measure out where the colors will go.
If you’re using a 24 x 30 board like I did, you can actually skip this step! I’ve measured for you! lol. Use the measurements below. If your board is a different size, map out what you think you’d like it to look like and where you need to tape.

Download and print this image for your measurement cheat sheet.


STEP THREE: Start taping off where you don’t want the paint.
This part is fairly easy if you have 1.5” painters tape. You’ll start along the edges of the board. Make sure you get it straight because these are you guides. Do you strip of paint around the perimeter, and then add a second strip of tape inside of that. You should now have 3” taped off on all sides. (Measure to make sure! It is easier to make changes now rather than later.)
After you have the perimeter taped off, measure down 3.5” from the top. Mark this in at least 2 different places. Now place a strip of tape horizontal across the board so that the top of the tape meats up with your marks. You have now created your first block for paint; the inside should be 3.5” tall.
Measure down 3.5” from the bottom of the last piece of tape. Mark this measurement in at least 2 different places. Again, place a strip of tape horizontally across the board so it meets up with your marks at the top of the tape. Your 2nd block should look just like the first. Go ahead and check your measurements and make sure things are looking straight. Re tape if anything looks off.
Repeat the previous step 3 more times. You should end up with 5 boxes all 3.5” tall. At the bottom of the board, you’ll have taped off a 3.5” border. (All other sides of the board will be a 3” border.”
Make sure everything looks straight and even. Redo any tape strips if you need to.


STEP FOUR: Begin painting!
Get your paint ready and grab your 3” painters brush!
Read the tips below before beginning:
-For more interest, leave the tail end of the color block wispy and not fully covered, so it looks more like a paint stroke.
-It may take several strokes to get the color block covered. Don’t think that it is actually just one stroke of paint! (Even though it is made to appear that way.)
-Alternate which direction your paint stroke starts. I started on the left with the 1st color block. The 2nd color block I started from the right. Continue alternating.
-Create a brush stroke, and then let it dry for about 20 minutes. Add a 2nd coat to the start of your brush stroke, so it will be more opaque on one end. I just left my paint sitting out while the board dried a little bit, so I didn’t have to recreate my setup.

STEP FIVE: After the paint dries, carefully remove the tape.
Removing the tape is the best feeling. You’re left with a beautiful, modern painting!


I hope this tutorial was helpful! Feel free to leave a comment if you have any additional questions! Share your final pics with us at @TextureDesignCo
To see the entire room reveal, visit this post.
Best,
Emily Kirby

