

DIY Nursery Mobile
Motto: When you can’t find what you’re looking for, GO and MAKE it!
Oftentimes, this thought process gets me in over my head, but in the case of Chappy’s nursery, it proved useful.
I had a specific idea in mind for his mobile. However, I couldn’t find ANYTHING that looked remotely like what I was thinking. Sooooo I figured I’d just DIY something for the space. After a little trial-and-error, I was very happy with the final product. Check out the design process below.
DIY difficulty level: Due to time and various measuring involved, I would say an 7 out of 10.


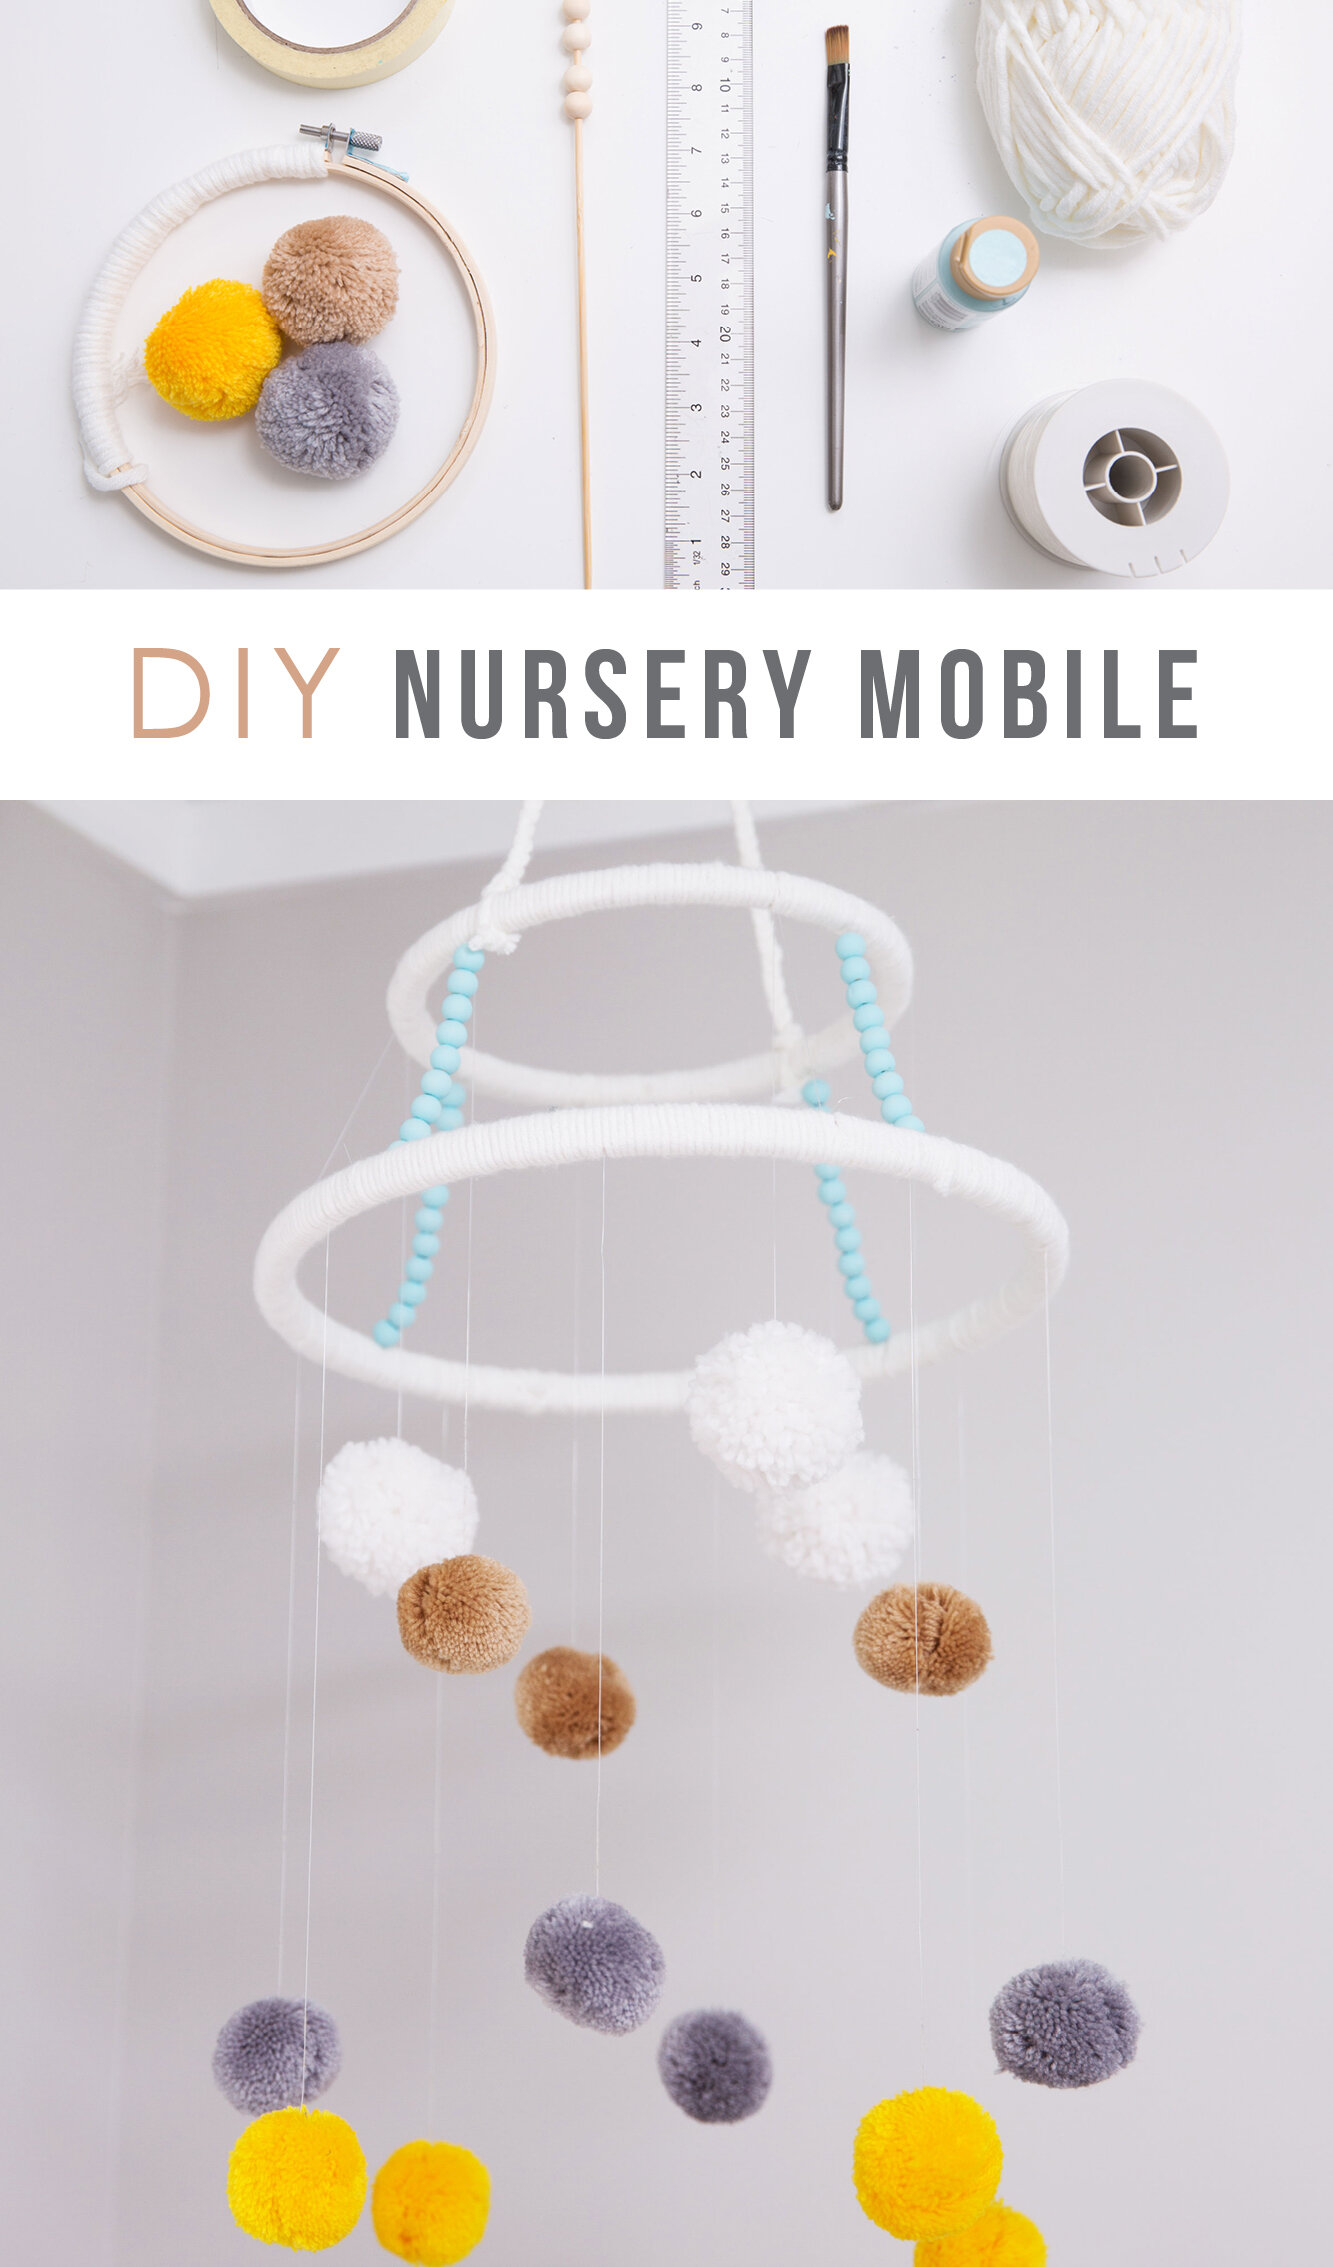
Supplies for DIY Nursery Mobile:
(2) Bamboo Cross Stitch Hoops, different sizes (I used 12” and 8” diameter.)
White Yarn (I prefer a little chunkier yarn.)
(14) Pom poms.
Yellow
Grey
Taupe
White
Wood Beads
Acrylic Craft Paint
Paintbrush
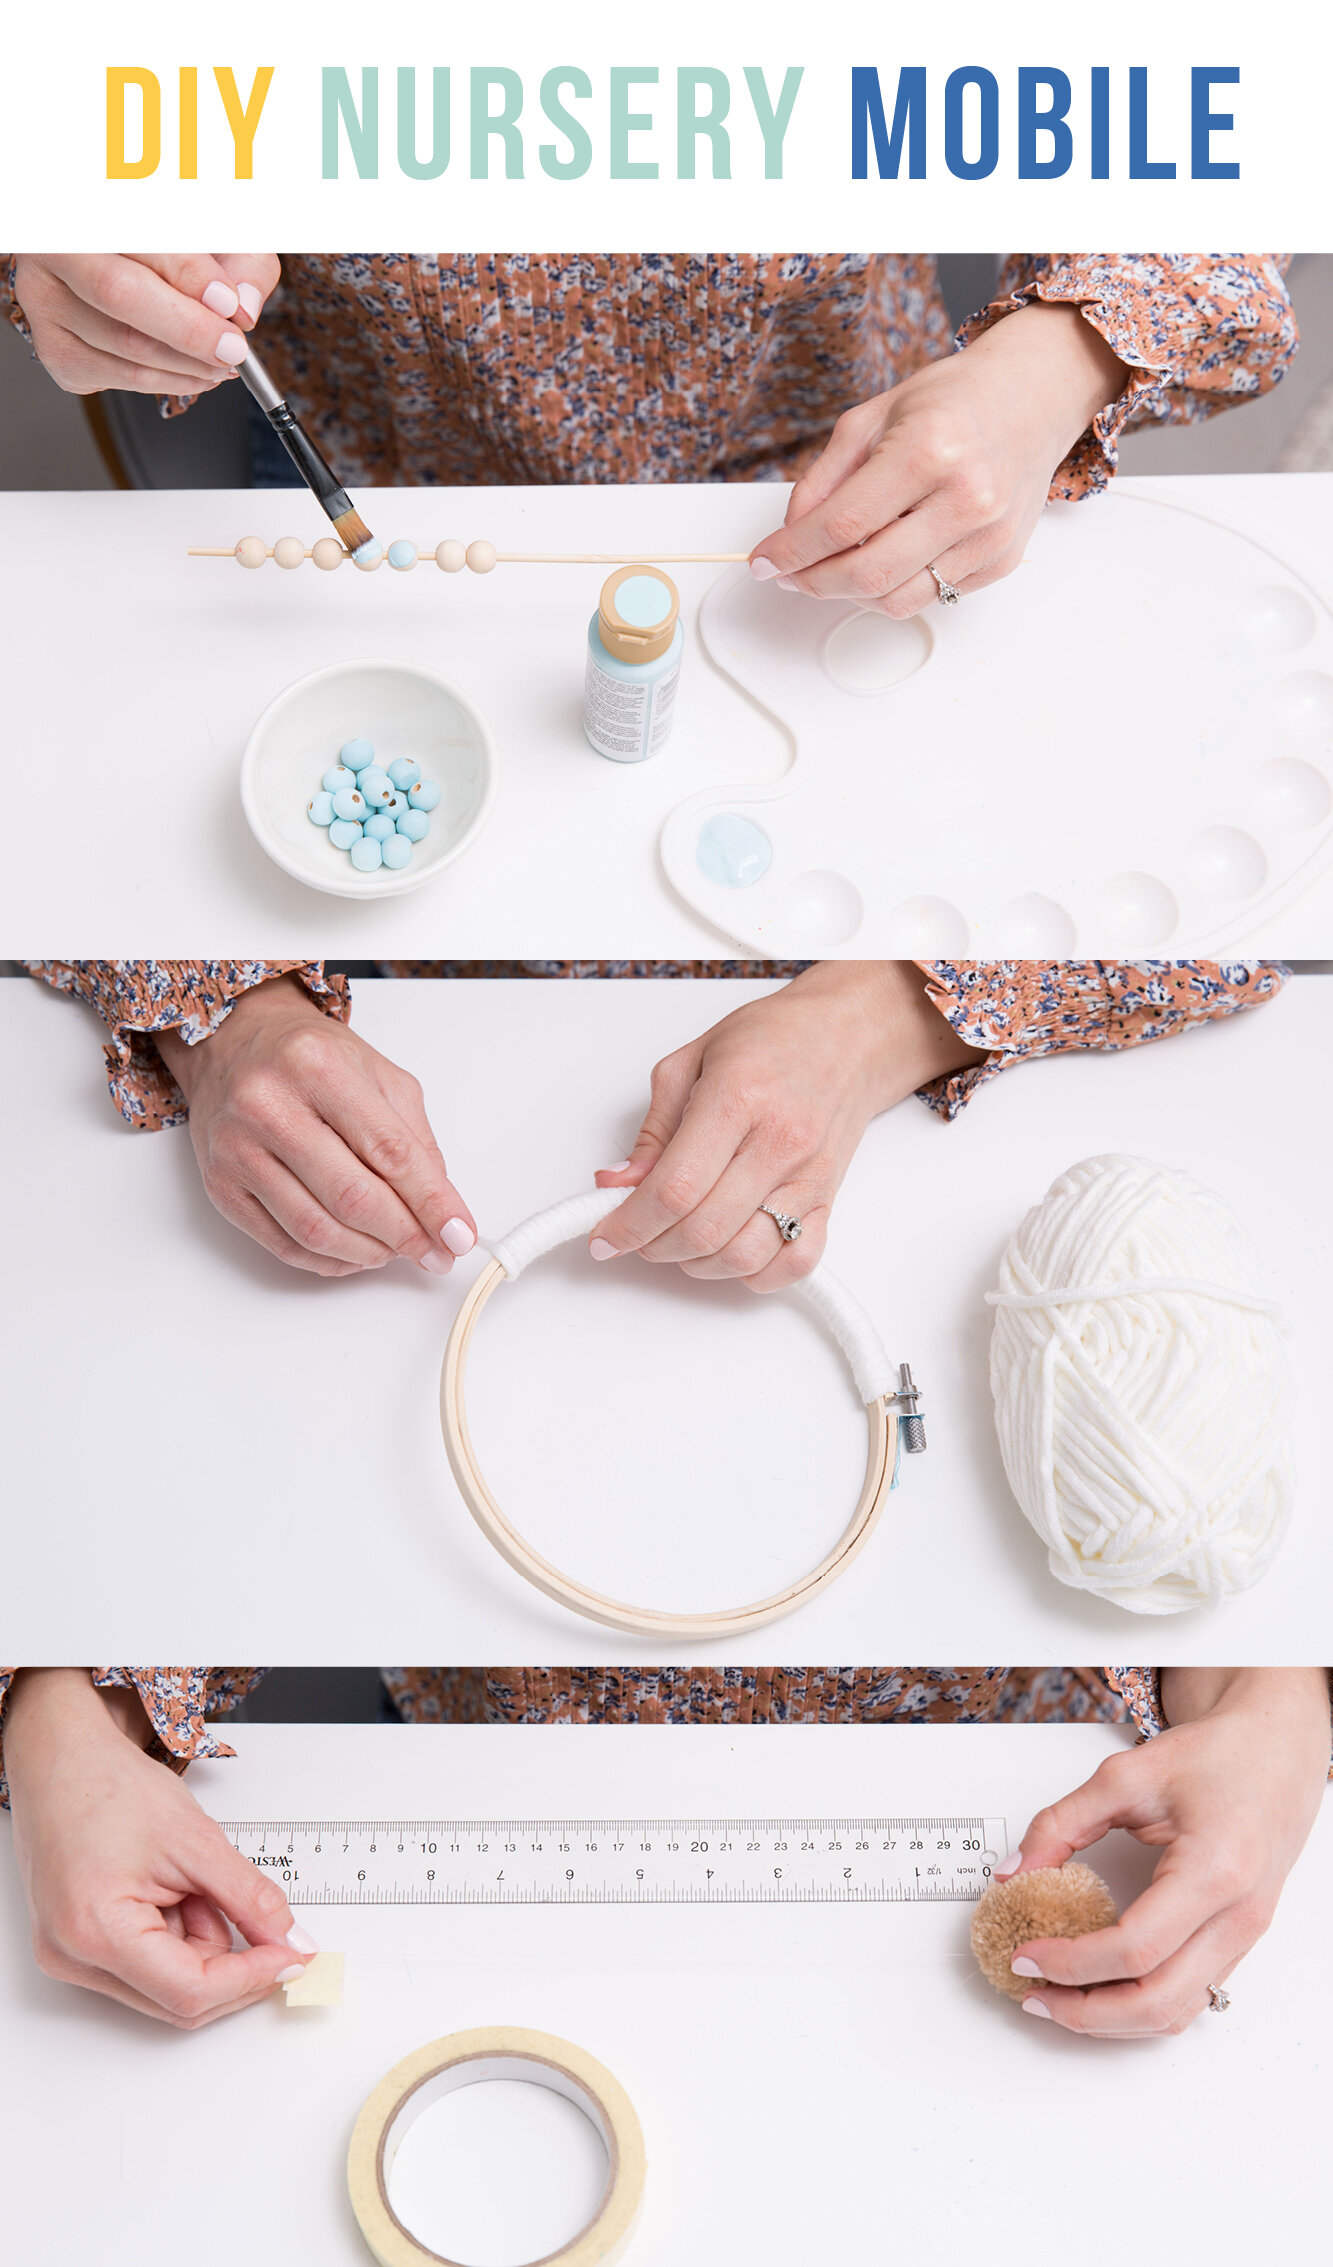
Ruler
Masking Tape
Fishing Line


STEP ONE: Wrap the cross stitch hoop with yarn.
I found it easier to cut long pieces of yarn and ball it up in my hand, then I would wrap the hoop. Wrap over all yarn ends so there are no strands hanging off. Tie the yarn off when done and trim the end.


STEP TWO: Paint the woods beads using the acrylic craft paint.
I found some wood skewers in the kitchen, so I used them to hold the beads steady while painting.
I painted about 50 beads. While they are drying, move to step three.

STEP THREE: Using fishing line, attach the two yarn-covered hoops, leaving about 6” between them.
Tie a strand of fishing line to the smaller circle, leaving about 12” hanging. Do this 3 more times so that you have 4 strands of fishing line coming off of the smaller hoop in equally spaced distances.
PRO TIP: After tying the fishing line to the first hoop, measure 5.5” and put a piece of masking tape after that. This will help you know where to tie your knot when attaching the second hoop.
Using your masking tape as a guide, tie each strand to the larger hoop in 4 equally distanced places. This should allow the larger hoop to hang evenly below the smaller hoop.
Trim excess fishing line.


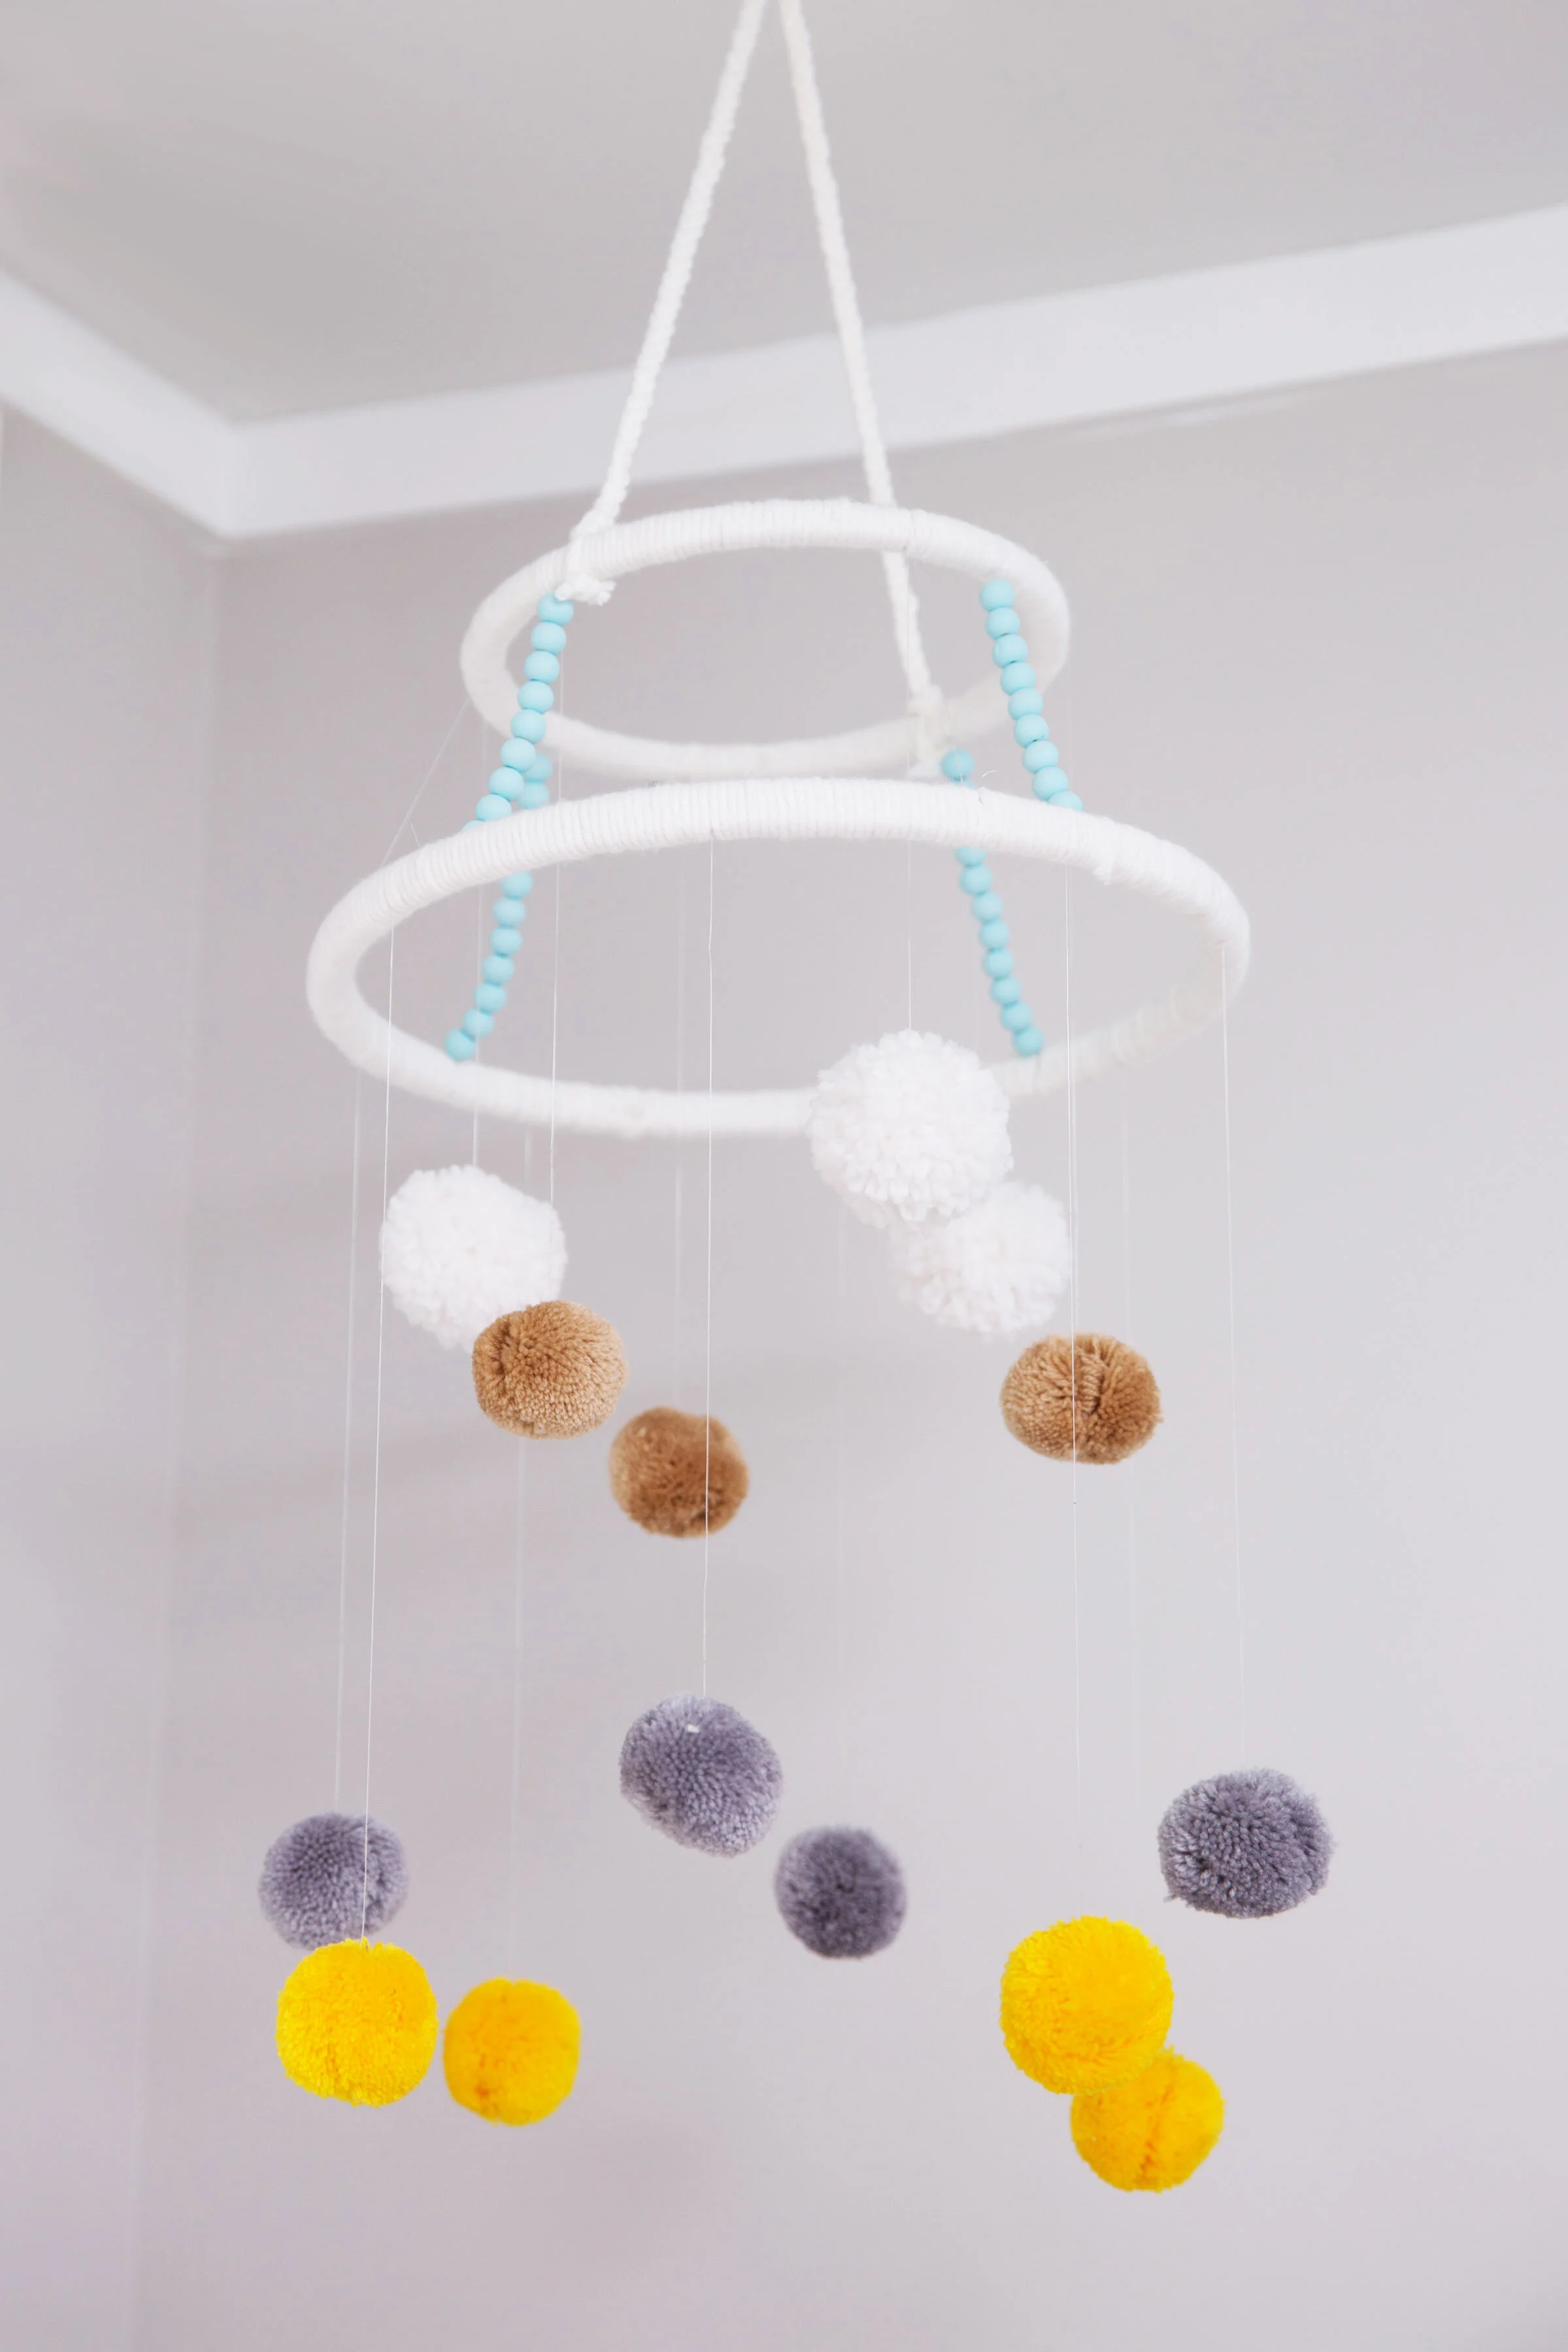
STEP FOUR: Tie fishing line to the pom-poms and attach to the hoops.
Cut strands of fishing line about 24” , then tie them around the pom-poms with a secure knot. Decide how long you want your pom-poms to drop down. (I chose a different length for each color.)
Once again, measure the length and place a piece of masking tape where you want the fishing line to end at the hoop. Now using your tape as a marker, tie the pom-poms to the hoops. You can hang some from the larger hoop and some from the smaller hoop to add variety and depth.
In my example:
Grey = hangs down 13” from the larger hoop
Yellow = hangs down 11” from the larger hoop
Taupe = hangs down 10 from the smaller hoop
White = hangs down 7” from the smaller hoop
*Distance measures from the top of pom-pom to the bottom of hoop. Does not include height of the pom-pom.
Trim excess fishing line.


STEP FIVE: Tie fishing line to the bottom hoop and string on the beads.
In 4 equally distanced places, tie about a 12” strand of fishing line to the larger hoop. Next add about 11 beads to the strand. Depending on how much space you put between the top and bottom hoops, you may want more or less beads.
Once you string the beads, tie the strand to the smaller hoop above. Repeat this for all four strands of beads.


STEP SIX: Cut three strands of yarn about 36” and braid them together.
Determine how low you want the mobile to hang, and then double that number and add about 2”. This will tell you how long to make your braid. (Cut your yarn much longer than you want the braid. My yarn was about 36”.)
PRO TIP: Knot the 3 strands together on one end, but leave about 3” on that end for tying to the mobile. Tape the knot to a desk or table. Now it will be easier to braid.
After braiding, knot the end. (You want to leave about 3” strands on either end of the braid so you can easily tie it to the mobile.)
On either side of the smaller hoop, tie on the braid using the yarn strands. Trim the excess yarn, and you are done!

How did it go? Have questions? Leave me a comment or shoot me an email! Would love to help. Also, post a picture of your final product and tag @texturedesignco. We’d love to share your work!
Don’t have time to work on this project now? Pin the images below to your Pinterest board, and come back to it when you have a chance!
Have a great day,
Emily